We mostly talk about SAML with Workspace ONE but i’m asked occasionally if Workspace ONE Access can support OpenID Connect? The answer is yes, of course it can. Just keep in mind before you start to configure OpenID Connect, Workspace ONE Access only supports the email, profile and user scopes.There is no support for custom scopes nor the ability to modify the attributes that are returned in the provided scopes.
Workspace ONE Access supports the Authorization Code Grant as well as Client Credentials. For OIDC, we only support Authorization Code.
Lets walk through the process to setup an OIDC Application. We are going to use the OpenID Debugger application from Auth0.
Create the SAAS Application
- In the Workspace ONE Administration Console, go to Catalog -> Webapps
- Click New
- Provide a Name: ie. OpenID TestApp
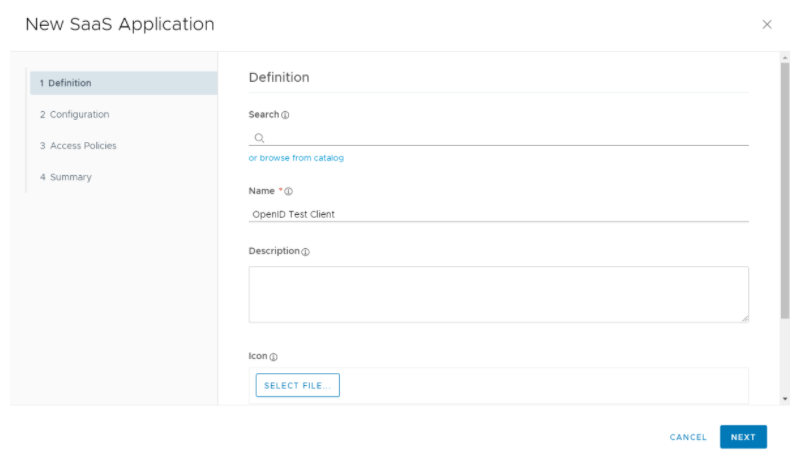
- Click Next
- Select OpenID Connect from the Drop List
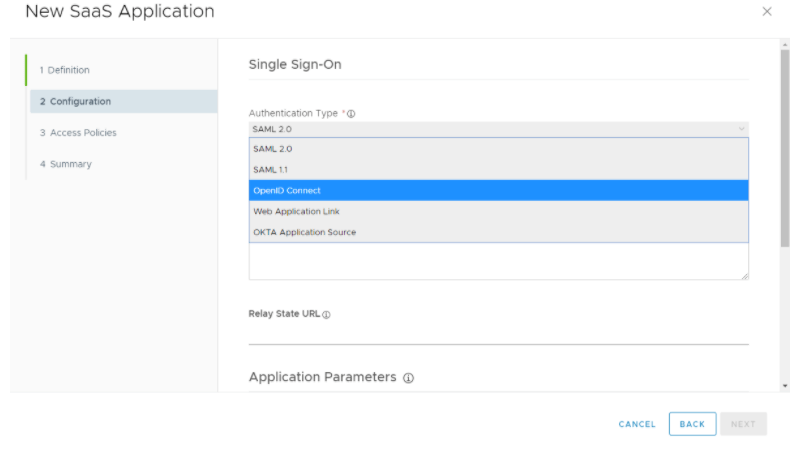
- Complete the fields as per your application requirements. The following is a sample for Auth 0 Client Connect App.
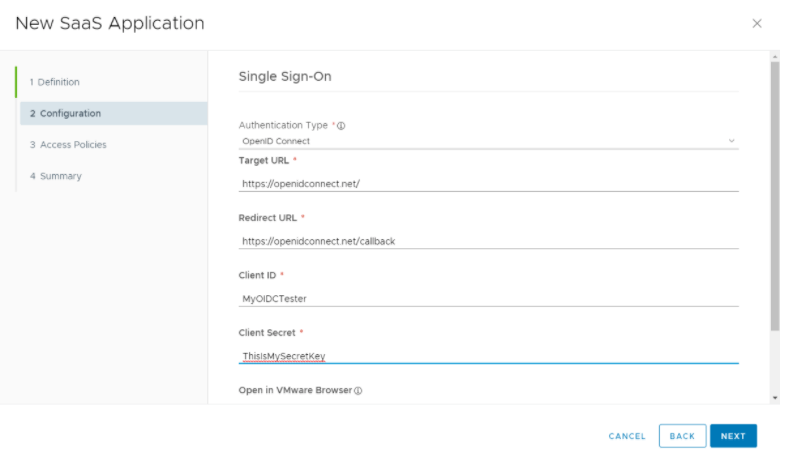
Target URL
This is just a web link to the target application
https://openidconnect.net/
Redirect URL
If you need more than one redirect URL’s you can add them later. Only one will be accepted here.
https://openidconnect.net/callback
Client ID
Enter any Client ID that will be used in the calling application. Do Not Use Spaces or special characters.
MyOIDCTester
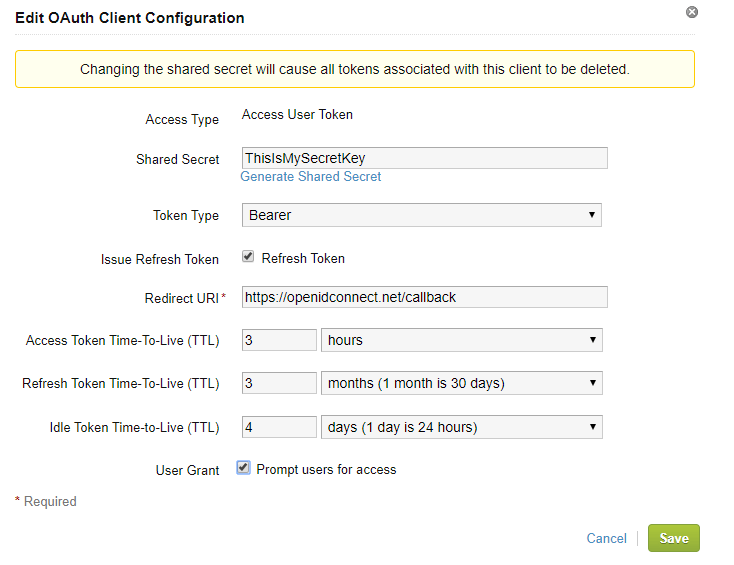
Client Secret
Enter a secret that will be used by the calling application.
ThisIsMySecretKey
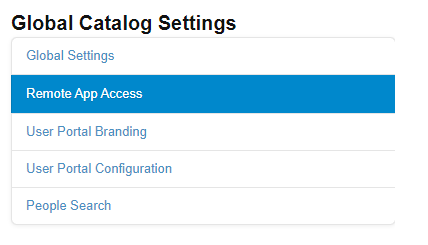
Modify the Remote App Access Client
A remote app access client will automatically get created. We will need to modify this client.
- Go to Catalog -> Settings
- Click on Remote App Access
- In the Client List, look for the Client ID that was used in the earlier step. In my example, I used “MyOIDCTester”

- Click on the Client ID
- Under Scopes, Click Edit
- Select Email and Profile

- Click Save
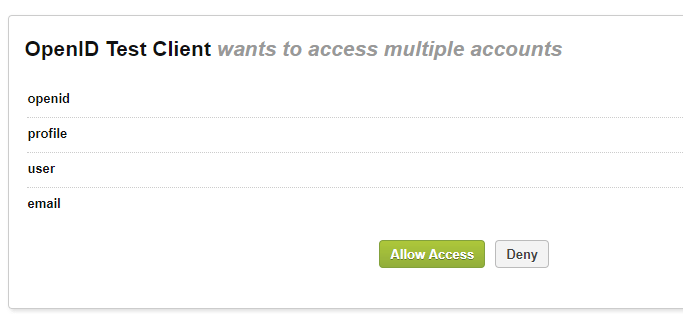
- If you want to prompt the user to authorize the user grants, you will need to do the following steps: I will skip this step for now.
- Click Edit beside Client Configuration
- Select “Prompt Users for Access”
Testing with the Auth0 OpenID Connect Debugger
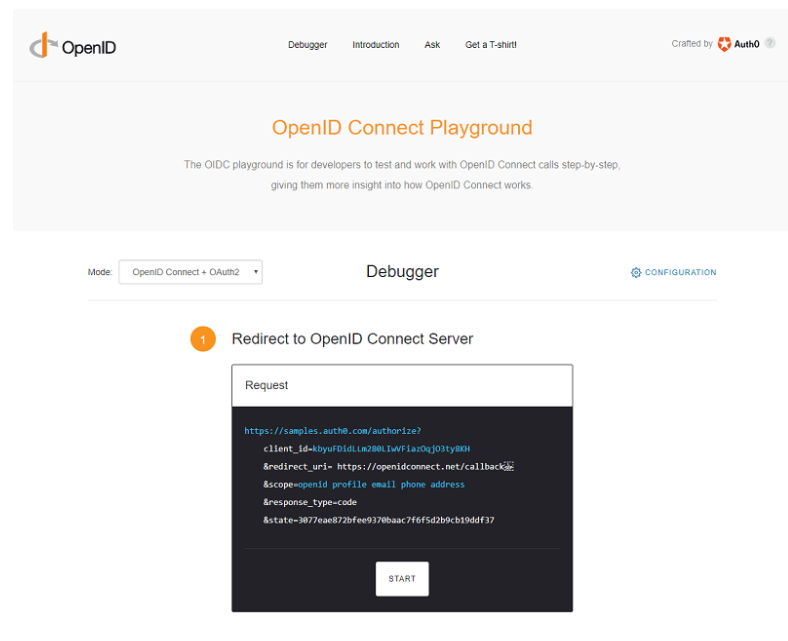
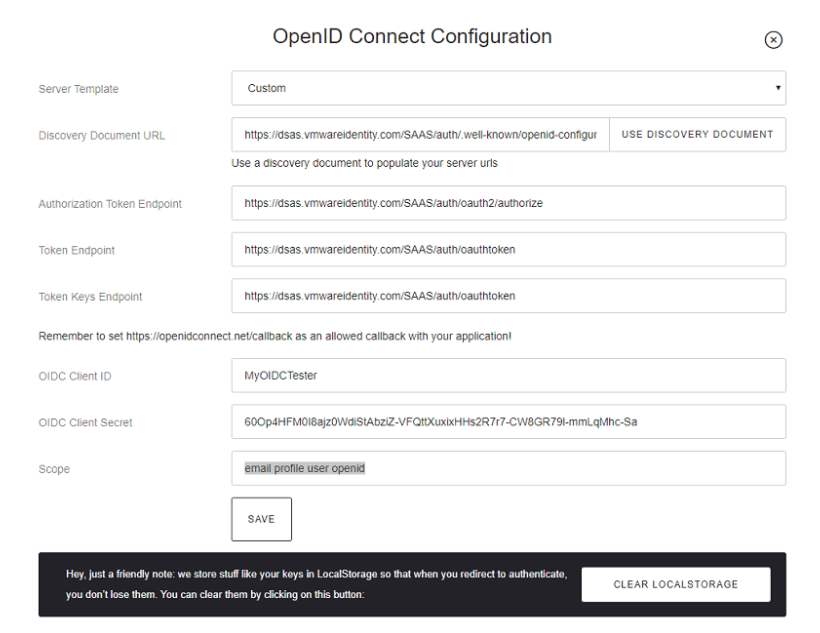
- Click on Configuration
Template Custom
Discovery URL https://%5Btenant%5D//SAAS/auth/.well-known/openid-configuration
ie.https://dsas.vmwareidentity.com/SAAS/auth/.well-known/openid-configuration
Authorization Token Endpoint https://%5Btenant%5D/SAAS/auth/oauth2/authorizeie.https://dsas.vmwareidentity.com/SAAS/auth/oauth2/authorize
Token Endpoint & Token Keys Endpoint https://%5Btenant%5B/SAAS/auth/oauthtoken
ie.https://dsas.vmwareidentity.com/SAAS/auth/oauthtoken
OIDC Client IDMyOIDCTesterOIDC
Client Secret ThisIsMySecretKey
Scope email profile user openid
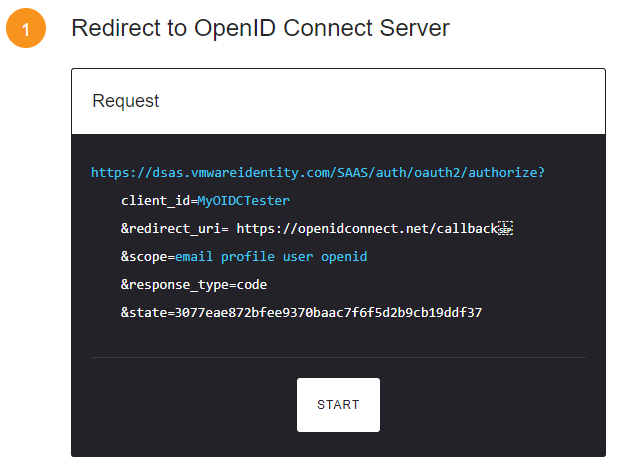
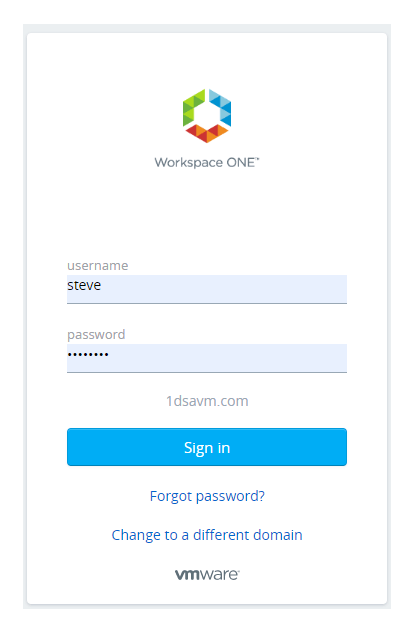
- When prompted to Authentication, select your domain based credentials (Do no use System Domain)
- If you selected “Prompt Users for Access” they will be prompted and required to Allow Access:
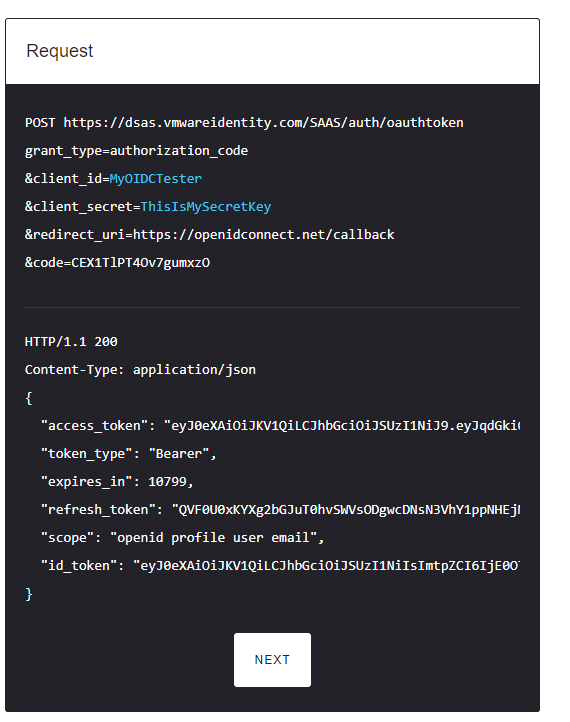
- You will now see your Authorization Code in the OIDC Debugger. Click Exchange to get your Access Token.

- You will now see your Bearer Token, ID Token and your Refresh Token.
- Click Next
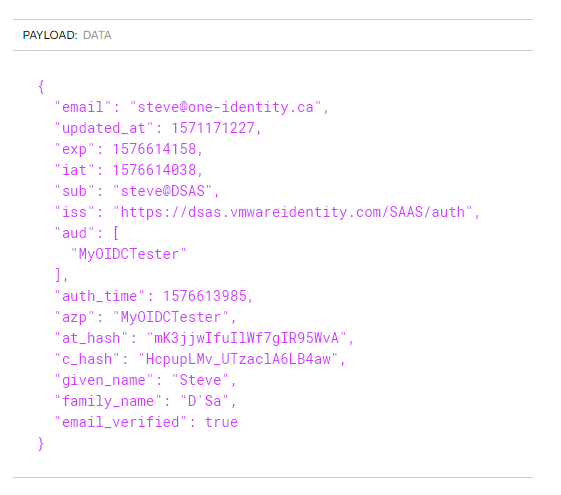
- The ID Token will contain information regarding the identity. Click “View on JWT.IO” to see your JSON Tokens.
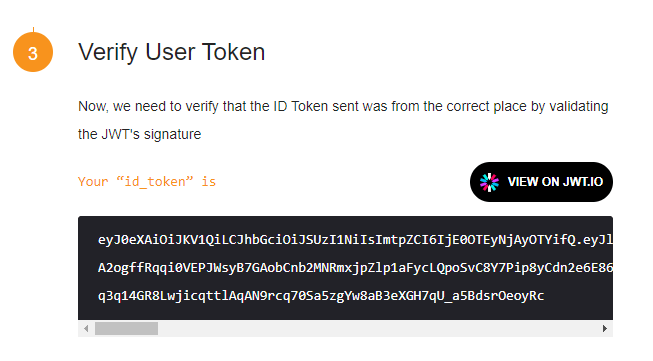
- You JWT Token will be displayed with your profile and user data:

Hello, you mention that you can add another redirect URL later. How do you do that? I only see a single spot. Thank you!
LikeLike
Hi Bryan, you should be able to add them all in the single field. You will need to user a space delimiter between URLs.
LikeLike