
Perhaps you are an existing Workspace ONE UEM customer or you are starting off fresh with a brand new Workspace ONE UEM tenant – and in comes a Welcome to Workspace ONE Access email. Now what?
Workspace ONE Access is engine that drives the Workspace ONE Platform. It not only provides Access Management capabilities but it connects the Workspace ONE Platform (and all the hub service components) to your enterprise directories and cloud services (including third party IdP’s).
It may not always be clear on how to get started setting up Workspace ONE Access and linking it to your Workspace ONE UEM tenant. In this blog we will walk through the process of getting started with Workspace ONE Access and Workspace ONE UEM.
- Connecting Workspace ONE Access
- Configure Mobile Single-Sign-On Setup
- Managing your Users
- Enabling Intelligent Hub Services
- Enabling Workspace ONE Access as Source Authentication
- Device Enrollment Test
- Troubleshooting the Enrollment Setup

Connecting Workspace ONE Access
To get started we need to connect Workspace ONE Access to Workspace ONE UEM. We always recommend to use the Wizards to get started. However, there are times when the wizards may not be available so I will walk through the process of using the Wizards and the manual steps as well.
Using the Getting Started Wizard
- In Workspace ONE UEM, click on Getting Started (in the top left).
- Click on Begin Setup for Workspace ONE

- Scroll down to the “Identity and Access Management” section
- Under “Connect to Workspace ONE Access”, click Configure.

- On the splash screen, click Continue

- Enter your Workspace ONE Tenant URL and your “System Domain” username and password:
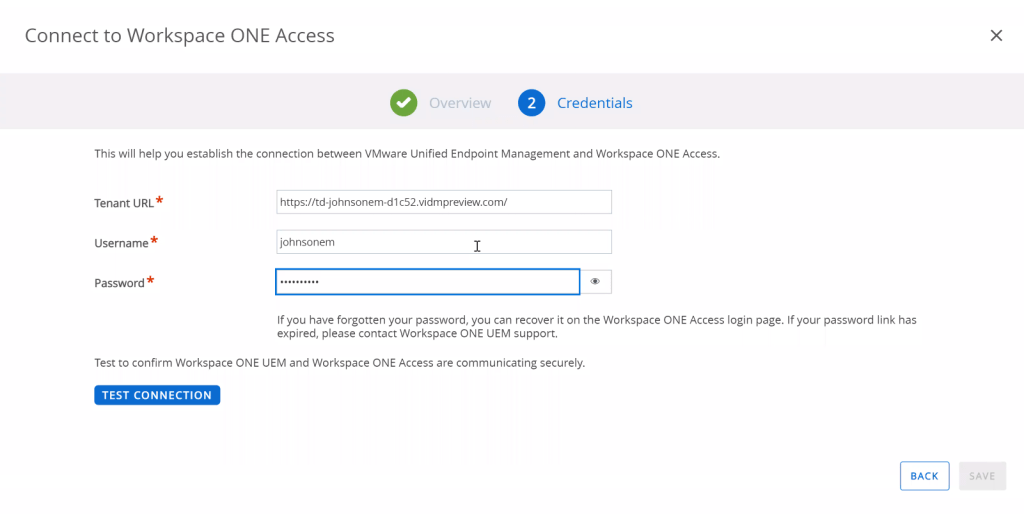
- Click Test Connection and verify that you have a “Test Connection Successful” message.
- Click Save
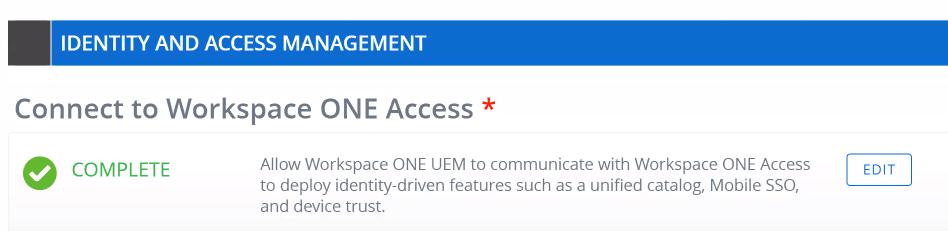
- This section should now be marked as complete
Troubleshooting:
- Verify that that you are using a system domain username and password
- If your Access Tenant was previously connected to another UEM tenant, you will need to delete the configuration from Workspace ONE Access. This can only be done via the API. I will try to add instructions at a later date.
- Make sure you have a Password (Local Directory) authentication method configured in Workspace ONE Access on your default access policy. You might have to move that policy to the top.
- Make sure you’ve not deleted or renamed the built-in IdP. You will need to re-created it.
Validating the Getting Started Wizard
So hopefully you ran the wizard successfully. So what did this wizard do?
If you log into your Workspace ONE Access Tenant and go to Identity & Access Management -> Setup (on the far right) -> VMware Workspace ONE UEM. You will now see your UEM tenant configured in Workspace ONE Access:
Manually Connecting Workspace ONE Access
As I mentioned before, if the wizards are available, please use the wizards. The wizards will create a service account along with API Keys that exempt from Workspace ONE UEM built-in rate limiting.
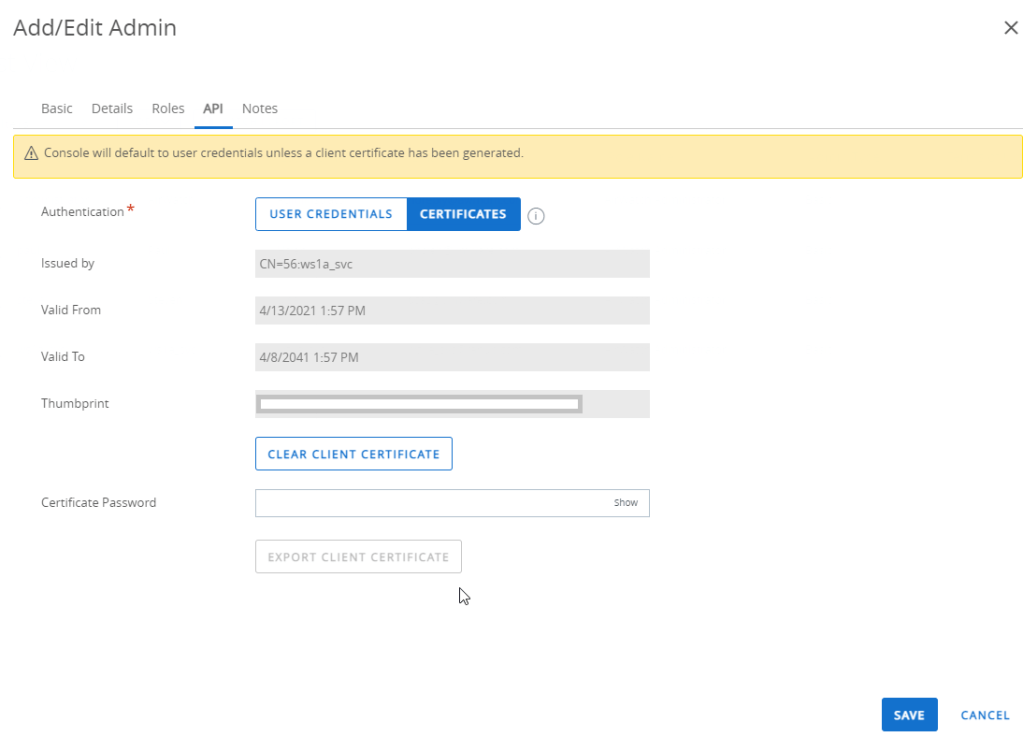
Create a Service Account
- In Accounts -> Administrators
- Create a new “Basic” administrator with the role “Console Administrator” (or AirWatch Administrator) for your Organization Group.
- Under API, select certificates and create a password
- Save the User and then export the certificate for the user.
Create API Keys
- In Groups & Settings -> All Settings -> System -> Advanced -> API -> Rest API
- Enable API Access (if not already enabled)
- Create two new API Keys. One will be admin and the other will be Enrollment User.

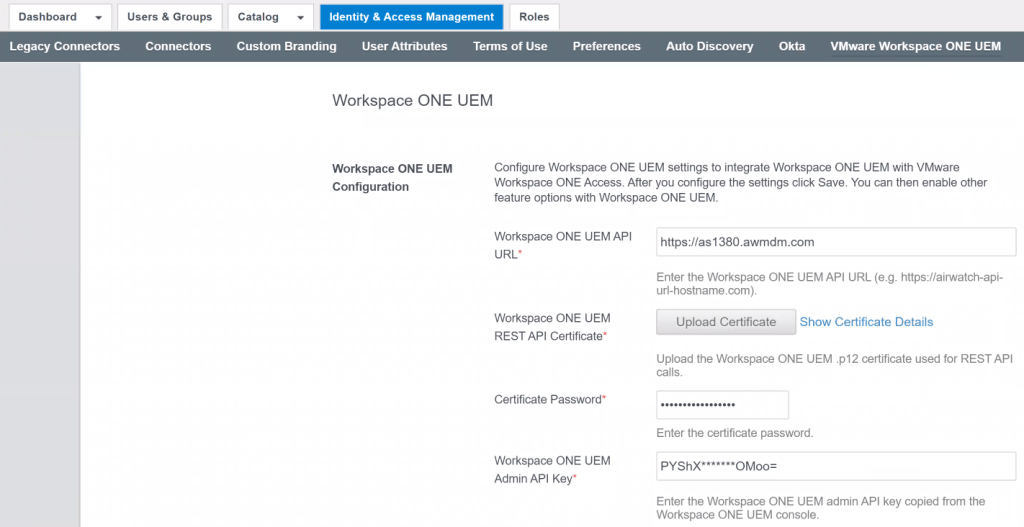
Configure VMware Workspace ONE UEM in Workspace ONE Access
- In the Workspace ONE Access console, go to Identity & Access Management -> Setup -> VMware Workspace ONE UEM
- Enter your Workspace ONE UEM API URL, ie. https://as135.awmdm.com
- Upload the certificate you previously created for the service account along with the password
- Enter your Admin API Key
- Enter your Enrollment User API Key
- Enter your top Group ID
- Click Save
- In the catalog section, enter your device services URL, ie. https://ds135.awmdm.com
- Enable Device Compliance
- Click Save
Configure Mobile Single-Sign-On Setup
We are now going to configure the Authentication Methods in Workspace ONE Access.
- Lets go back to the “Getting Started Section” of Workspace ONE UEM
- Under Workspace ONE -> Continue
- Under Identity & Access Management -> Mobile Single-Sign-On, click Configure

- On the splash screen, click “Getting Started”

- Click Continue
- Click Start Configuration
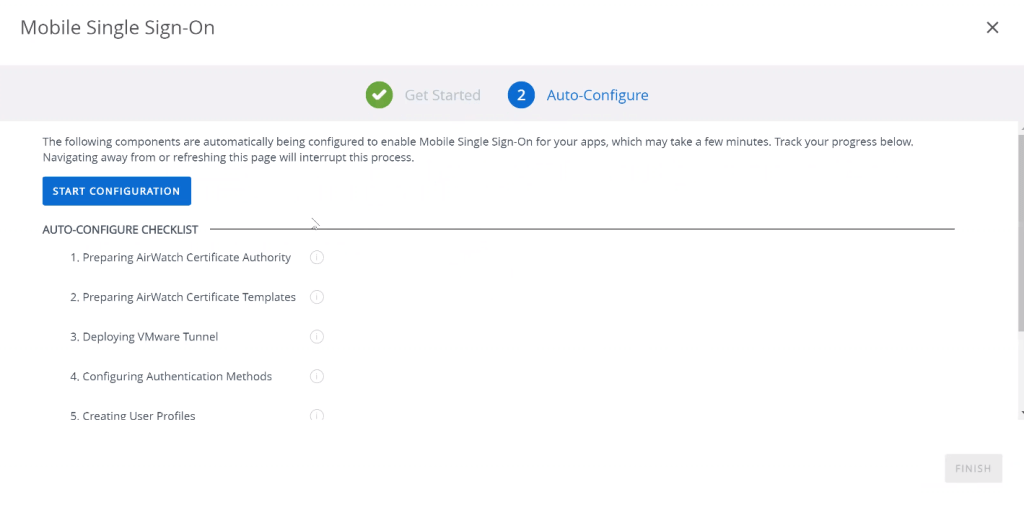
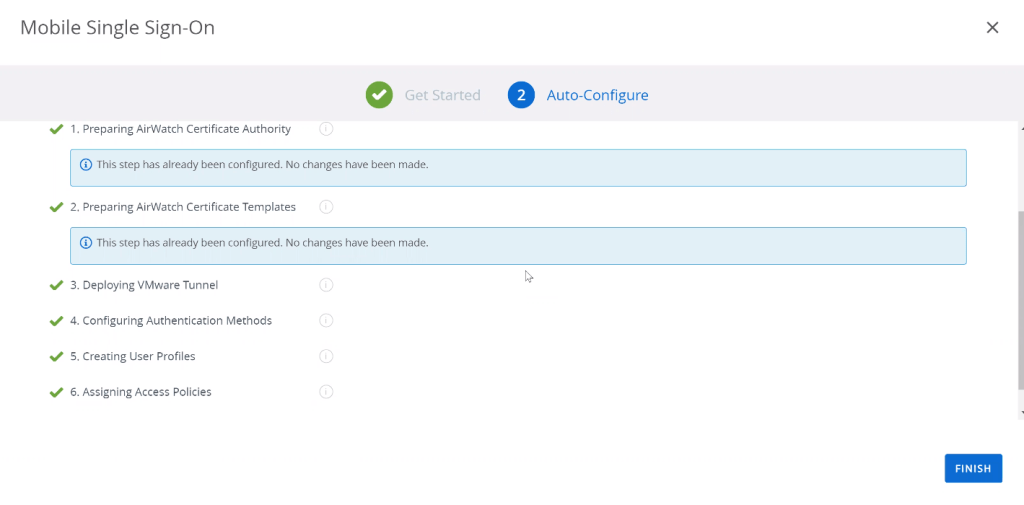
- This can take a few minutes to complete but you should see all green check marks:
Validating the Mobile SSO Wizard
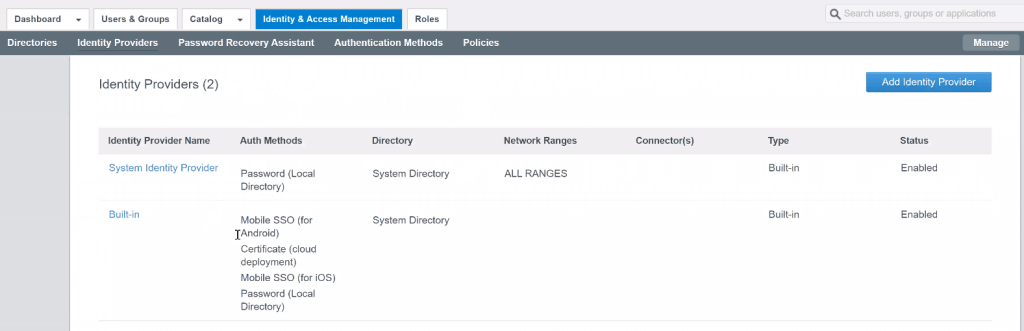
If the Mobile SSO Wizard ran successfully, in Workspace ONE Access -> Identity & Access Management -> Identity Providers, you will see the Built-in IDP has been modified to include our new authentication methods:
In Authentication Methods, you will see our new Authentication Methods are configured and Enabled:

In your Access Policies, you will also see that they are pre-configured as well.
Caveats of the Mobile SSO Wizard
The Mobile SSO Wizard will definitely save you a lot of time but there are some special caveats that you should be aware:
- The Wizard creates Mobile SSO profiles in Workspace ONE UEM but they are not assigned to any smart groups. You will need to assign the profiles to your smart groups.
- The IOS Mobile SSO profile, in the Single-Sign-On payload, will contain a Realm of “VMWAREIDENTITY.COM” If your Workspace ONE Access tenant is using a different domain like workspaceoneaccess.com or vidmpreview.com, you will need to update the realm. The realm should be in all caps.
- For Android Mobile SSO, the tunnel proxy rule may incorrectly state the proxy url as “cert-proxy.vmwareidentity.com:5262” Please update the proxy URL to point to your correct tenant domain and remove the dash in the cert proxy. The correct value should look like “certproxy.vmwareidentity.com:5262” or “certproxy.workspaceoneaccess.com:5262”
- In the built-in IDP for Workspace ONE Access, you will need to select “All Ranges” for the network range.
If your Mobile SSO Wizard did not complete successfully, you will need to complete it manually.
Managing your Users
You need to sync Users into your Workspace ONE UEM and Workspace ONE Access environments. How you create users in Workspace ONE UEM and Access will have an impact on the capabilities or features you can use in the platform.
Its important to note that Workspace ONE UEM and Workspace ONE Access should be sourced from the SAME external identity source. This means if you are using a connector to pull users from Active Directory into Workspace ONE UEM, then you can NOT use Okta to create users in Workspace ONE Access.
This blog is not intended to go through the intricacies or steps to configure user management but we’ll go through some of the more popular options at a high level.
First, both Workspace ONE Access and Workspace ONE UEM leverage the “External ID” from the identity source. In both platforms, they contain attributes that need to be mapped to the External ID.
The External ID in Workspace ONE UEM and Workspace ONE Access need to match.
Here are some options for managing users:
- Use the Workspace ONE UEM Connector and Workspace ONE Access Connector to sync users from Active Directory
- Use a SCIM Connector to create users in Workspace ONE Access and use the AirWatch Provisioning Adapter to create users in Workspace ONE UEM.
- Use the Workspace ONE UEM Connector to Active Directory and use “Active Directory Basic” in UEM to sync users to Workspace ONE Access.
- Use JIT to create users in Workspace ONE Access and users the AirWatch Provisioning Adapter to create users in Workspace ONE UEM. You will need to make sure that when you JIT users into Workspace ONE UEM that you include an External ID attribute.
- Use JIT to create users in Workspace ONE Access (including the External ID) and use JIT to create users in Workspace ONE UEM (include the same External ID)
Feature Matrix for User Sync Options
| Capability | UEM Connector with AD Basic | Access Connector | SCIM Connector/JIT |
|---|---|---|---|
| User/Password Authentication (Single AD Domain) in WS1 Access | Supported | Supported | |
| User/Password Authentication (Multiple AD Domain – 2 Way Trust) in WS1 Access | Supported | ||
| Okta Universal Directory | Supported | ||
| Mobile SSO (IOS/Android) | Supported | Supported | Supported |
| Certificate Authentication | Supported | Supported | Supported |
| 3rd Party IDP | Supported | Supported | Supported |
| Radius Authentication | Supported | ||
| IWA (Integrated Windows Auth) | Supported | ||
| Horizon | Supported | ||
| Citrix | Supported | ||
| Flexible Sync Schedule | UEM will sync users to Access based on the schedule when users are synced to UEM. | Supported | Supported – Based on capabilities of SCIM Provider |
| Sync Subset of Users | UEM will sync all users to Access | Supported | Supported – Based on capabilities of SCIM Provider |
| People Search | Supported | ||
| WS1 Intelligence | Supported | Supported | Supported |
| Universal Catalog | Supported | Supported | Supported |
Enabling Intelligent Hub Services
In order to use the full capabilities of Workspace ONE Access, we need to enable Hub Services.
- In Workspace ONE UEM, go to Groups & Settings -> Configurations
- If prompted, click Go To Configurations
- Select Intelligent Hub
- Select Getting Started
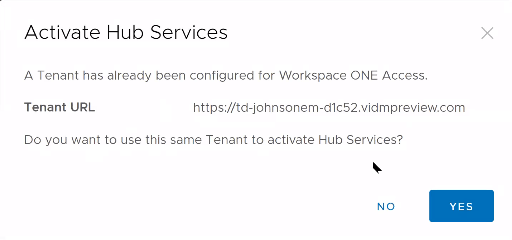
- Select Yes to Activate Hub Services
Enabling Workspace ONE Access as Source Authentication
- In Workspace ONE UEM, go to Groups & Settings -> All Settings
- Under Devices & Users -> General -> Enrollment
- Click Override
- Select Workspace ONE Access for Source of Authentication for Intelligent Hub
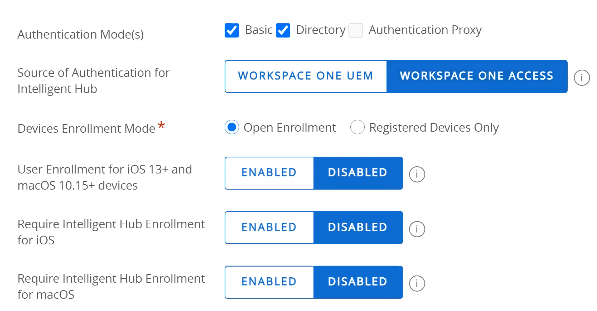
- Click Save
Device Enrollment Test
- On your Mobile Device, launch the Workspace ONE Intelligent Hub Application
- Enter your UEM Device Services Server and your Group ID
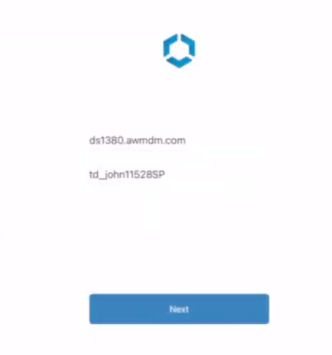
- Click Next
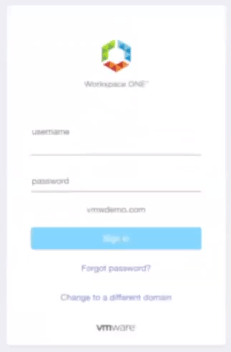
- You will now be prompted for your credentials (or potentially redirected to a 3rd Party IDP)
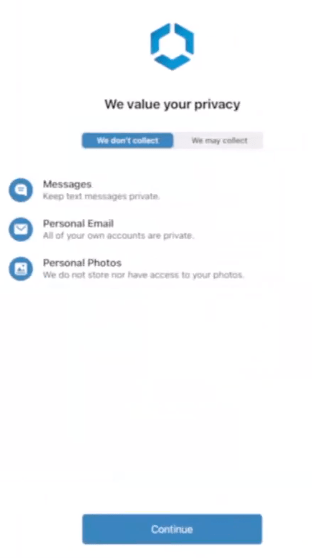
- Upon Successful Authentication, you should proceed into the enrollment flow:
Troubleshooting the Enrollment Setup
- You received an error “No Application found” in Workspace ONE Access
- Check to make sure you configured Workspace ONE Access Authentication in Enrollment Settings. See Section above.
- Check to make sure you have configured Hub Services as outlined above
- If you are doing a Web Enrollment or DEP, you need to configure the AirWatch Application in Workspace ONE Access.
- You received an Workspace ONE Hub Username & Password Prompt
- You probably enabled Workspace ONE Access Authentication in Enrollment Settings but you did not enable Hub Services. See Section above.

- You received an error “Failed lookup subscription to resource” in Workspace ONE Access
- Check to make sure you configured Workspace ONE Access Authentication in Enrollment Settings. See Section above.
- Check to make sure you have configured Hub Services as outlined above
- If you are doing a Web Enrollment or DEP, you need to configure the AirWatch Application in Workspace ONE Access and the application is assigned to All Users.

- You received an error “Access Denied” in Workspace ONE Access
- Make sure your Device Enrollment Policy includes an authentication method that can be used during enrollment like Password (Cloud Deployment) or 3rd Party IDP. See blog on setting up Access Policies for more information.

Hello Steve, Thanks for this useful topic, is there any chance you can tell me where to start to “delete the configuration from Workspace ONE Access”, I couldn’t find anything in VMware Docs relating this.
LikeLike
Hi Helal, let me see if I can add it to my blog. You are correct that problem won’t find it anywhere because it requires use of the API. You can also contact your VMware support or SE and they should be able to help you.
LikeLike
LikeLike
OOh, Actually I didn’t expect the quick reply, Thanks So much Steve, I done the steps on my test tenant, And also VMware Support Engineer done the same steps today in the production but with HZN cookie method and it worked!
LikeLike
Thanks Steve, very useful. Would be great if you could publish a guide on how to delete the UEM integration from workspace one via api. Thanks
LikeLike
Let me see if I can add this to my blog. I will update you once it is there.
LikeLike
LikeLike