Workspace ONE Access now has the capability to factor in your login risk into authentication decisions. The login risk score uses the proprietary risk scoring engine from Workspace ONE Intelligence. When enabled, Workspace ONE Risking Scoring will analyze your login behavior and set a baseline for your profile. Workspace ONE Intelligence will provide a risk score to Workspace ONE Access which we can then use in our policy engine.
In order to use Workspace ONE Login Risk Score, you will need a Workspace ONE Intelligence instance and you will need to enable the Workspace ONE Access Integration.
Getting Started With Workspace ONE Intelligence
- Login into your Workspace ONE UEM Console
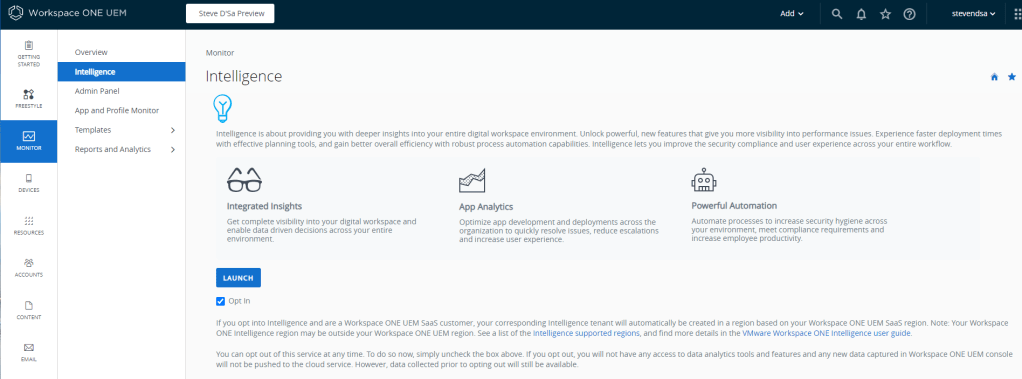
- Click on Monitor -> Intelligence
- Click Launch
Note: If you not setup Workspace ONE Intelligence, click on the Getting Started button at the bottom.
- Click on Integrations from the top menu
- If Workspace ONE Access is not currently enabled, Click the Setup Link:
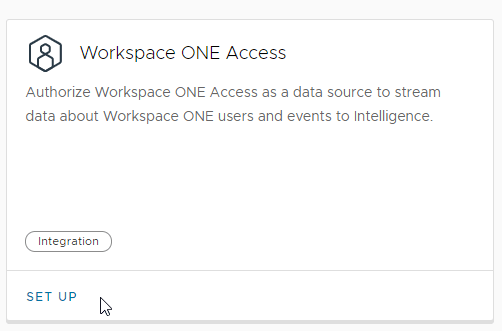
- Enter your Workspace ONE Access URL and Connect:

Configuring the Login Risk Authentication Method
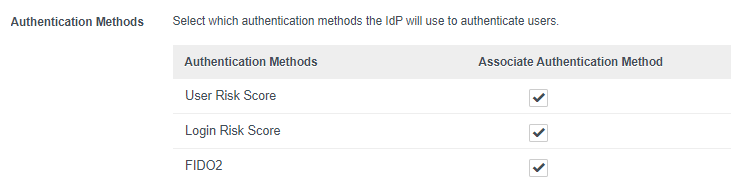
- In your Workspace ONE Access Console, click on Identity & Access Management -> Authentication Methods

- You should now see the option for Login Risk Score. Note: User Risk Score is a separate risk scoring solution.
If you don’t see the option for Login Risk Score, make sure your Workspace ONE Access tenant is enabled in Workspace ONE Intelligence (per the previous section). - Click the Pencil icon for Login Risk Score
- Enable the Login Risk Score
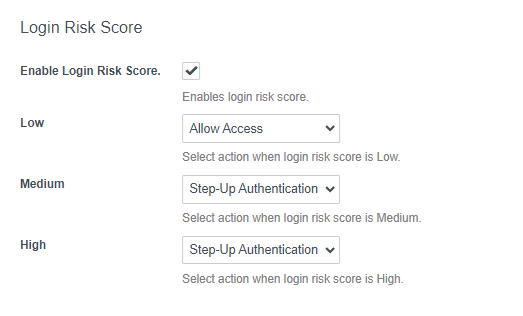
- In this section, you need to define the appropriate action for each level of risk. You can choose between Allow Access, Step-Up Authentication and Deny Access for each risk level.
I strongly recommend you configure Allow Access for low risk as this will be the default risk level for all users. It is also recommended to keep all risk levels with an Allow Access action until you get an adequate baseline for all your users and get a proper representation of how many medium and high scores you are seeing. Once you have this baseline you can edit this section to include any Step-Up Authentication or Deny Access actions.
- Click Save
- In Identity & Access Management -> Identity Providers, click on your Built-in IDP
- Select the Login Risk Score Authentication Method to associate it with your Built-in IDP
- Click Save
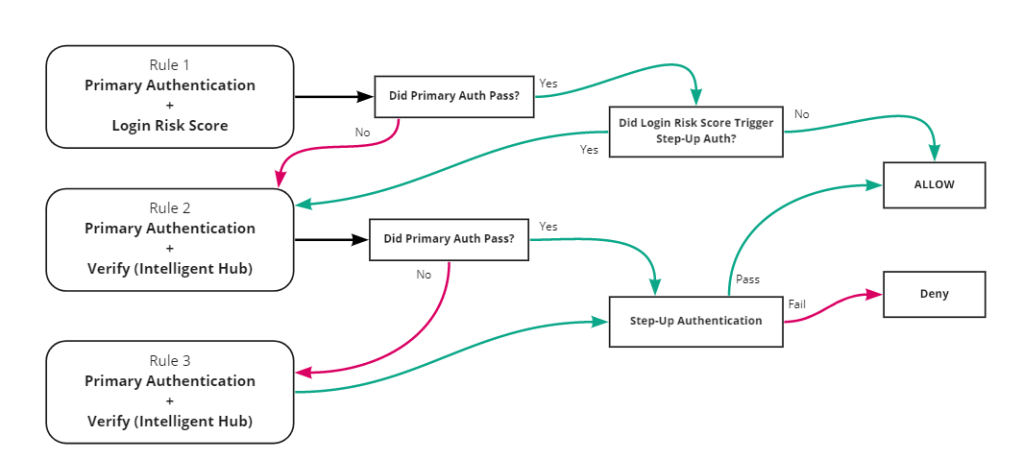
Configure Workspace ONE Access Policies
Configuring your Workspace ONE Access Policies might be a little confusing with Login Risk Score. Please see my previous blog on Best Practices for Workspace ONE Access Policies.
Lets take a look at a sample Workspace ONE Access Policy Rule:
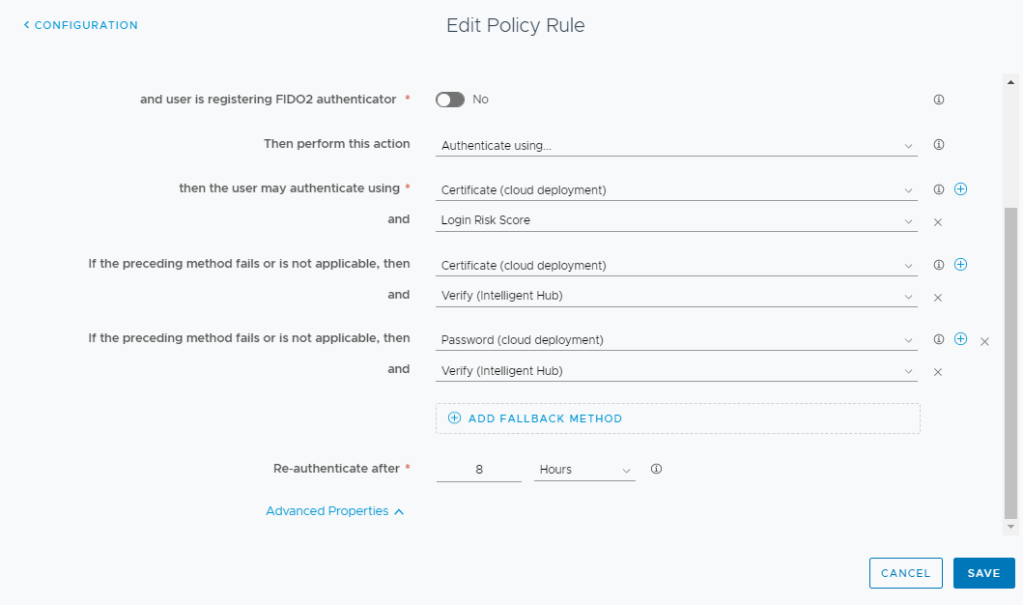
In the first condition, we are doing Certificate Authentication AND Login Risk Score. In this example, if Certificate Authentication fails, it will go to the next rule which includes certificate authentication again. This will result in an Password + MFA prompt. If there was no 3rd rule, it would result in an Access Denied Failure.
If the primary authentication (Certificate) passes, it will trigger the Risk Score Check. If the risk score check requires step up authentication, it will move to the next rule. This rule requires the primary authentication AGAIN. Since Certificate Authentication was already completed, it will not prompt again and automatically go to the step-up authentication. Since this step-up authentication was triggered by Login Risk Score a failure will not proceed to Rule 3.
Note After enabling Login Risk Score it can take a couple months to create the baseline for your users. You will not see Medium or High risk scores until this baseline is created.
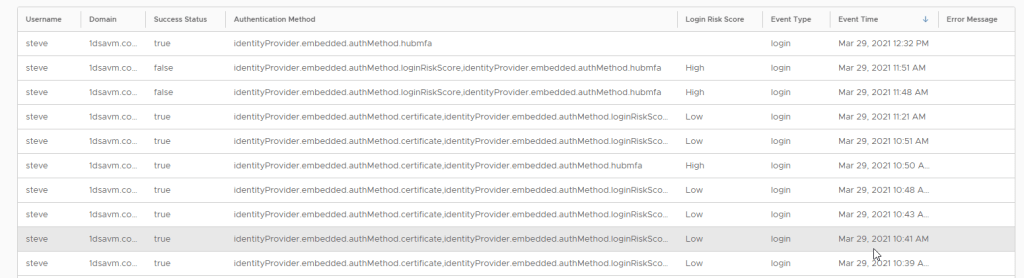
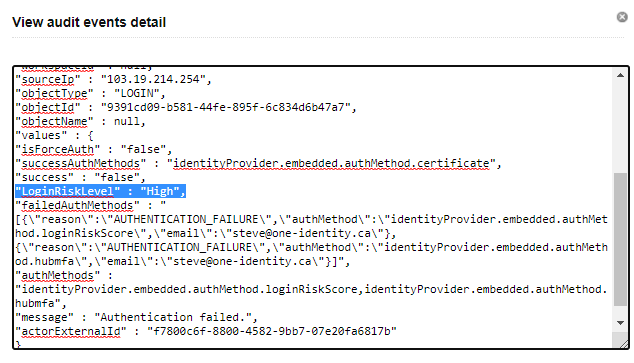
Workspace ONE Access Audit Events
In your Workspace ONE Audit Reports, if you open up an audit event, you will see the log in risk for a particular authentication event:
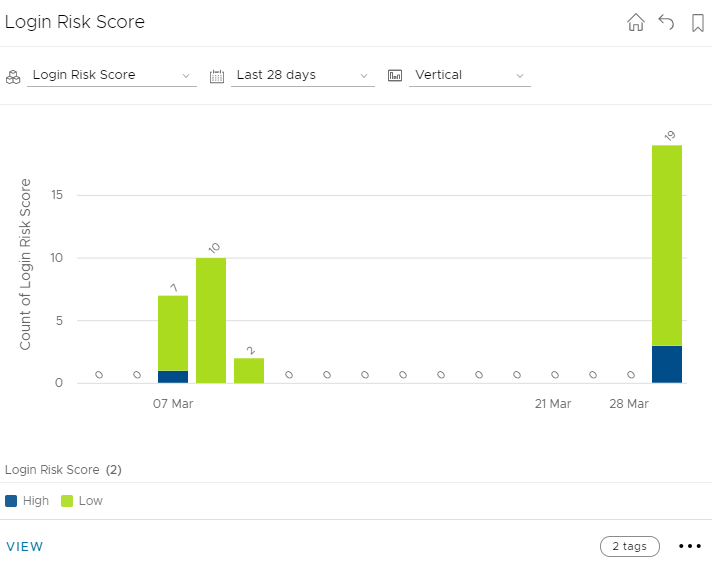
Workspace ONE Intelligence Dashboard
At the time of writing this blog, there is no pre-built Login Risk Score Widget to add to your WS1 Intelligence Dashboard. I will walk you through the process of creating your own:
- Log into your Workspace ONE Intelligence environment
- Click on Dashboards – > Default Dashboard
- Click +Widget

- Click the “START” link beside “Custom Widget”

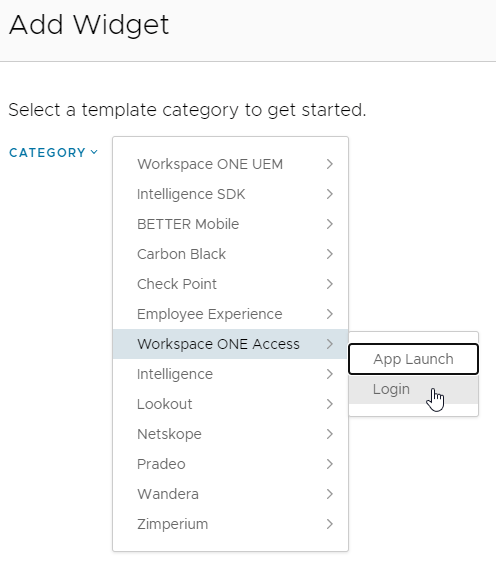
- Select Workspace ONE Access -> Login for the Category
- Provide a Title
- Select Login Risk Score for the Count Measure
- Select Login Risk Score in the Group by.
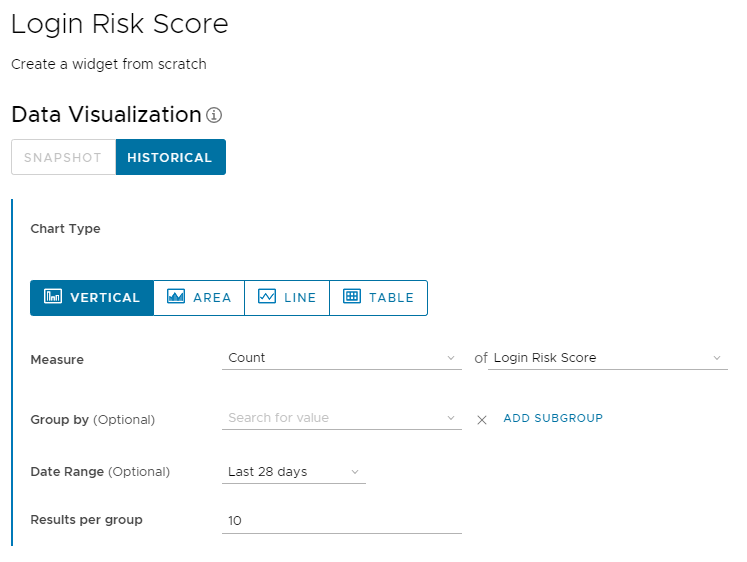
- Click Save
- Click Save for the Dashboard Layout
- Once your login widget is created, if you click on the View link at the bottom of the widget, you can see a tabular view of your logins: