If you have configured Okta as a 3rd Party IDP in Workspace ONE you might have noticed that the “Logout” function in Workspace ONE doesn’t log you out of your Okta session. The reason for this is that Okta does not include the “SingleLogoutService” by default in the metadata that is used when creating the 3rd Party IDP in Workspace ONE.
There are a couple extra steps that you need to do to enable this functionality. Before you begin, please make sure you download your signing certificate from Workspace ONE.
- Log into Workspace ONE
- Click on Catalog -> Settings (Note: Don’t click the down arrow and settings)
- Click on SAML Metadata
- Scroll down to the Signing Certificate and Click Download
Now you will need to log into your Okta Administration Console.
Using the Workspace ONE Official Application
- Under Application, Click on the Workspace ONE Application
- Click on the Sign-On Tab
- Click Edit
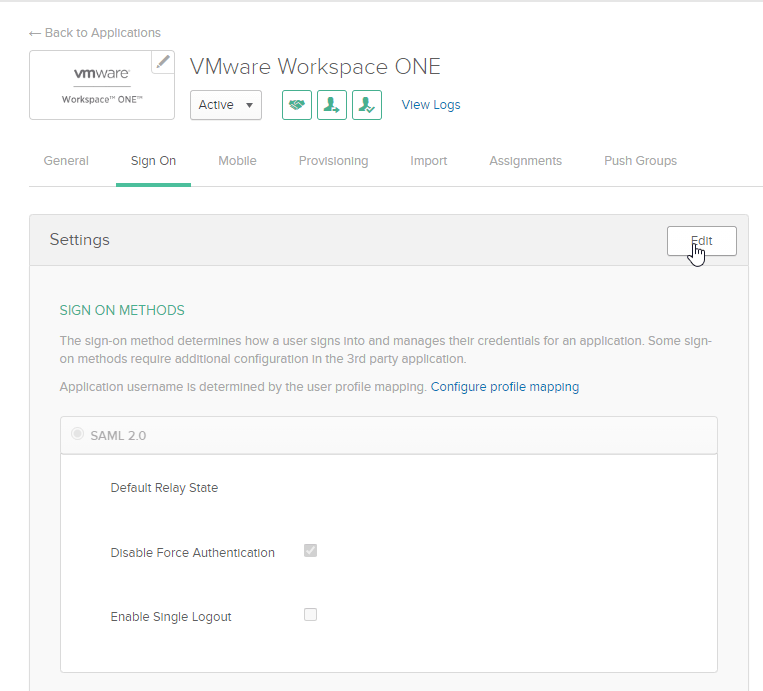
- Click “Enable Single-Logout”
- Under “Signature Certificate”, browse to the location you downloaded the Workspace ONE certificate in the previous steps.
- Click Save
- Download the new metadata that contains the logout URL.
Using a custom SAML Application
- Under Applications -> Click on the Workspace ONE application that you previously created
- Click on the General Tab
- Under SAML Settings -> Click Edit
- Click Next
- Click on “Show Advanced Settings”
- Enable the Checkbox that says “Enable Single Logout”
- Under “Single Logout URL”, enter: “https://%5BWS1Tenant%5D/SAAS/auth/saml/slo/response”
- Under SP Issuer, copy the value you have configured for Audience URI (SP Entity ID). This value should be: “https://%5BWS1Tenant%5D/SAAS/API/1.0/GET/metadata/sp.xml”
- Under “Signature Certificate”, browse to the location you downloaded the Workspace ONE certificate in the previous steps.
- Click Upload Certificate
- Click Next
- Click Finish
- Click on the “Sign On” tab
- Click on Identity Provider Metadata
- You will notice that your Identity Provider Metadata now includes the SingleLogoutService:
- Copy this metadata.
Update Workspace ONE IdP Configuration for Okta
- Go to Identity & Access Management
- Click on Identity Providers
- Click on your Okta 3rd Party IDP you previously created
- Paste your new Okta Metadata and click “Process IdP Metadata”
- Scroll down to “Single Sign-out Configuration” and check “Enable”. (Note: Make sure the other two values are left blank)
Now you should be able to logout from Workspace ONE and be signed out of both solutions.
