In the third installment of the Okta Integration with Workspace ONE, we are going to cover SCIM Provisioning from Okta to Workspace ONE.
In the first release of this functionality, there will be a lot of manual steps. I fully expect a more seamless process in future releases.
Minimum Requirements:
- Workspace ONE UEM SAAS or version 19.09 for dedicated/on-premise.
- Workspace ONE Access SAAS
- Note: Although some aspects of the integration will work for on-premise customers, not all functionality is currently available.
Note: When creating users in Workspace ONE from Okta, they will be created as new users in Workspace ONE Access and UEM. Any previous users synchronized from AD will not get over written. Users that are currently enrolled with AD credentials will need to re-enroll with Okta credentials (if you are switching from AD to Okta).
This process will require some proficiency and knowledge in using Postman to manage identities in Workspace ONE Access (formerly known as VMware Identity Manager). Please check out my blog on using Postman to Manage Workspace ONE Identities.
Here is a high level overview of the process:
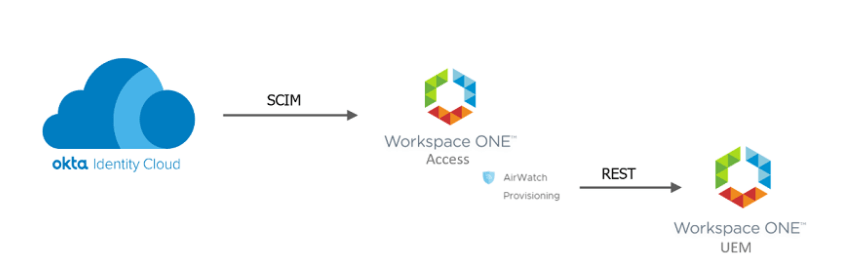
- Okta is configured to use Workspace ONE Provisioning Application
- Okta will SCIM the user to Workspace ONE Access
- The AirWatch Provisioning Adapter in Workspace ONE Access will provision the user to Workspace ONE UEM.
This blog will not going into detail on the provisioning to UEM. Please see the following blog on provisioning to UEM:
https://theidentityguy.ca/2020/11/10/workspace-one-airwatch-provisioning-app/
Step 1: Create a Remote App Access Client
- Log into Workspace ONE Access
- Click on Catalog (Down Arrow) and then Settings
- Click on Remote App Access
- Click Create Client
- Select “Service Client Token”
- Enter a Client ID ie. OktaSCIM
- Expand Advanced
- Click Generate Shared Secret
- Update the Access Token TTL to something longer then the default. Note: If you choose 1 year, you will need to update the Okta configuration every year with a new bearer token.
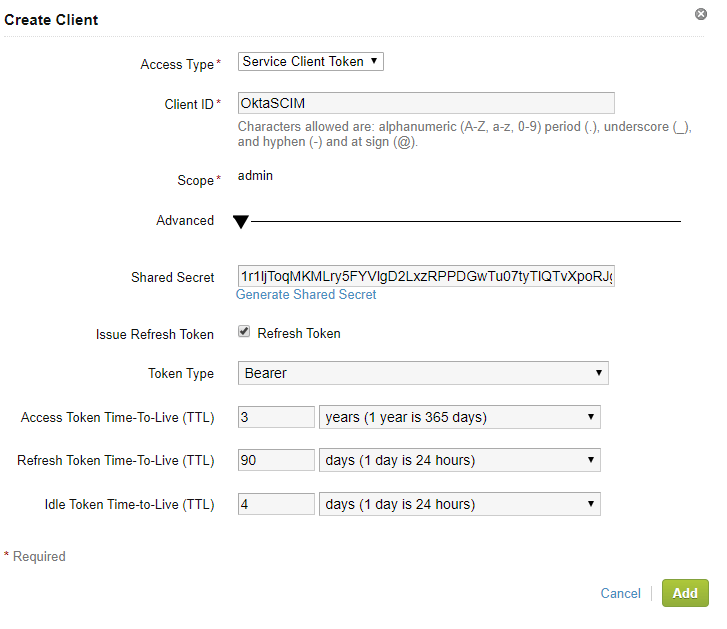
- Copy the shared secret. You will need this later.
- Click Add
Step 2: Configure Postman to use your OAuth Token
Note: Depending on your version of Postman, these steps below might be slightly different.
- Open a new Tab in Postman
- For the HTTP Method, select “POST”
- For the URL, enter: https://TENANTURL/SAAS/jersey/manager/api/connectormanagement/directoryconfigs
Replace the Tenant URL with your URL
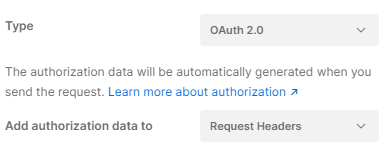
https://dsas.vmwareidentity.com/SAAS/jersey/manager/api/connectormanagement/directoryconfigs - In the authorization section, select “OAuth 2.0” as the type:
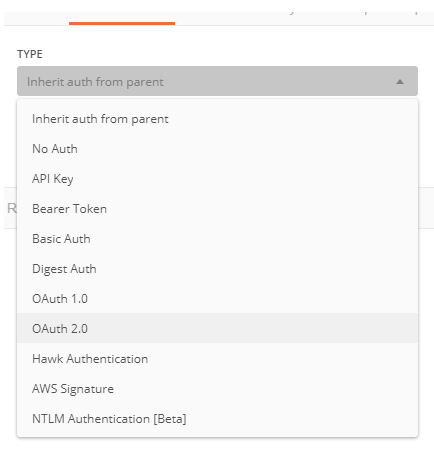
- Change “Add Authorization data to” so its equal to Request Headers
- Click Get New Access Token
- Provide a Token Name (ie. Workspace ONE)
- Under Grant Type, select “Client Credentials”
- “Under Access Token URL”, enter https:[Tenant URL]/SAAS/auth/oauthtoken
- ie. https://dsas.vmwareidentity.com/SAAS/auth/oauthtoken
- Under Client ID, enter your Client ID from step 1.
- Under Secret, enter your secret from step 1.
- Under Scope, enter ‘admin’
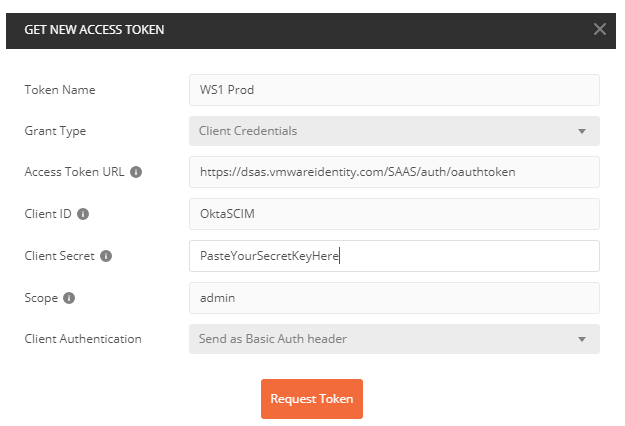
- Click Request Token
- Click the Headers Tab and verify that the bearer token was added as a temporary header.
- If the bearer token was not added, return to the Authorization Tab and select your token from the available tokens drop down list and preview the request again.

Step 3: Create an “Other” Directory for your Okta Users.
- Under “Headers”, Set the Content-Type to “application/vnd.vmware.horizon.manager.connector.management.directory.other+json”
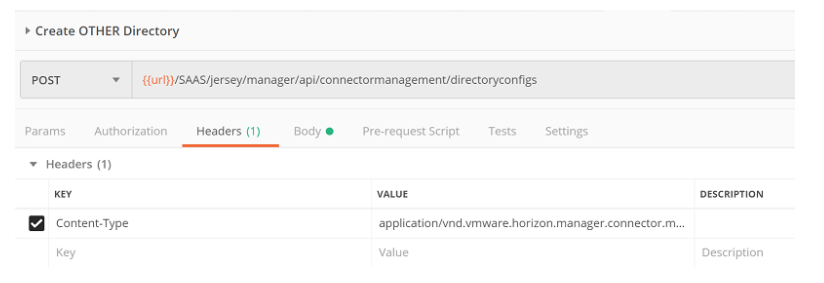
- Click on the Body tab
- Use the following as a sample and Click Send
{"type":"OTHER_DIRECTORY","domains":["Okta.com"],"name":"Okta Universal Directory"}
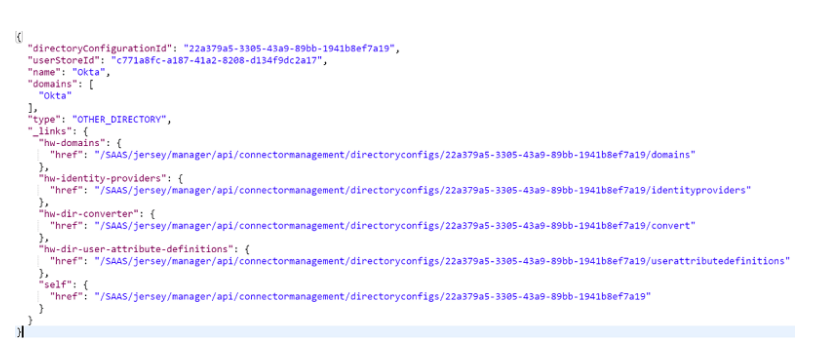
You should see a similar result
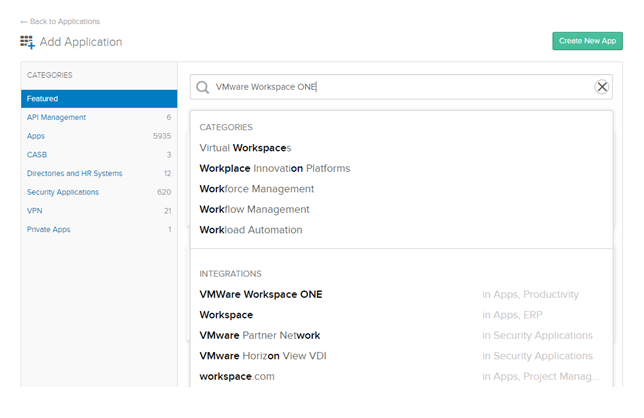
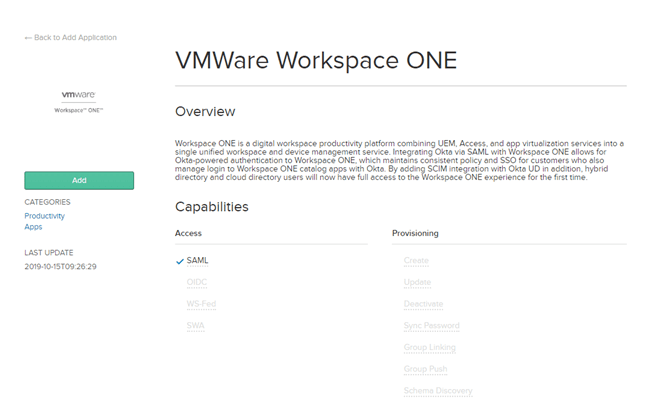
Step 4: Add the VMware Workspace ONE App in Okta
- Log into the Okta Admin Console
- Click on Applications -> Applications
- Click Add Application
- Search for the “VMware Workspace ONE”
- Select VMware Workspace ONE under Integrations:
- Enter your Workspace ONE URL in the field labeled “Base URL”
ie. https://dsas.vmwareidentity.com
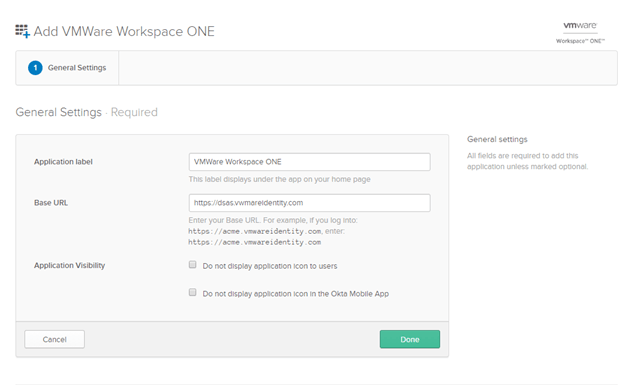
- Click Done
- Click on the Provisioning Tab and Click Configure API Integration
- Select Enable API Integration
- Paste your bearer token that was created in the earlier step with postman.
Note: This is the token you obtained via Postman and NOT the secret you generated in the Access Console. - Click Test API Credentials
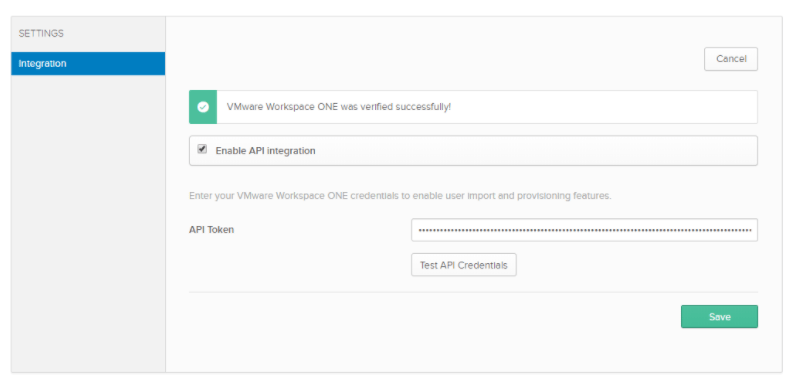
- Ensure you have a “Success” before proceeding.
- Click Save
- Click on the Edit Button
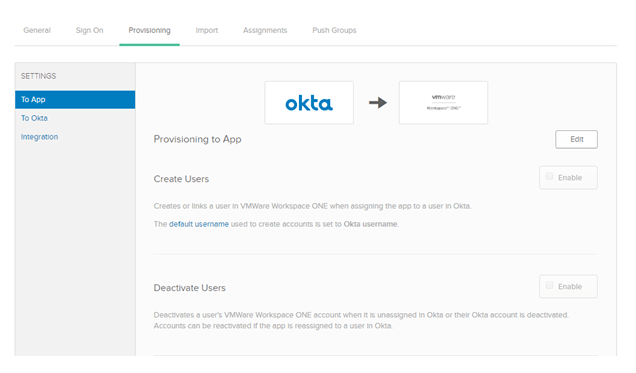
- Select Enable for Create and Deactivate and click Save
- If you used a different domain then “okta.com” when creating your directory (using Postman), you will need scroll down and edit the domain attribute so it matches your domain.

- You can now assign users and groups to the application
Note: Users needs to be assigned the application (either directly or via a group assignment) before you can push groups (along with memberships) to Workspace ONE.
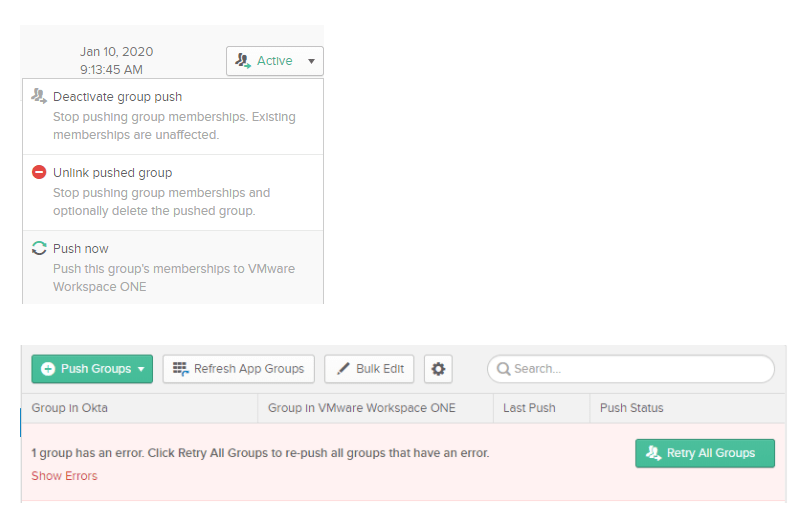
Known Issues:
- When pushing groups from Okta to Workspace ONE, Okta has a feature called “Push Now”. If you run into an error when using this capability, click the Retry All Groups button:

Hi Steve,
When trying to provision the Okta App, WS1 now uses the domain ‘workspaceoneaccess’ instead of ‘vmwareidentity’. How do we get around this issue? Creating a custom app doesn’t have the API integration tab. Does VMWare need to update the Okta app on their end?
LikeLike
On the general tab of the application, you are required to enter the full url of your tenant which includes the domain. Its not limited to just vmwareidentity.com
LikeLike
Looks like I had a / at the end which Okta didn’t like. Thanks for the quick response!
LikeLike
Hi Steve,
Jack again. On step 3, when I try to create the other directory in WS1, I get the error messaging below. I was able to do steps 1-2 and generate a token but getting stuck on this step
{
“errors”: [
{
“code”: “NOT_FOUND”,
“message”: “Resource not found.”,
“parameters”: null
}
]
}
LikeLike
I would make sure you have the Content-Type correct as per the instructions. Validate all the URLS are correct as well
LikeLike
Ah there was an extra space in the URL. My syntax has been all off today. Thanks again for the help!
LikeLike
Hi, after provisioning users from okta to WS1 Access with SCIM, How do you log in to WS1 Access with these accounts? looks like WS1 Access doesn’t see these account as they are from ‘Other Directory’ that has no IdP or Connector for Authentication and need to be added to Policies to use them.
any idea?
LikeLike