
A few years ago I published a blog on integrating Workspace ONE Access and ForgeRock AM 5.5. In that initial integration, it leveraged a capability in AM called the Identity Proxy. Although the identity proxy still works, a solution using ForgeRock Authentication Trees provides more powerful and flexible approach to incorporate Workspace ONE device security and risk validation using an authentication node. Authentication Trees also allow you to easily run JavaScript which is useful to check for specific device types during your authentication flow.
In using Authentication Trees, you can include the Workspace ONE Validation after you perform your initial authentication within ForgeRock or you can do it before any primary authentication in ForgeRock. Its completely up to you.
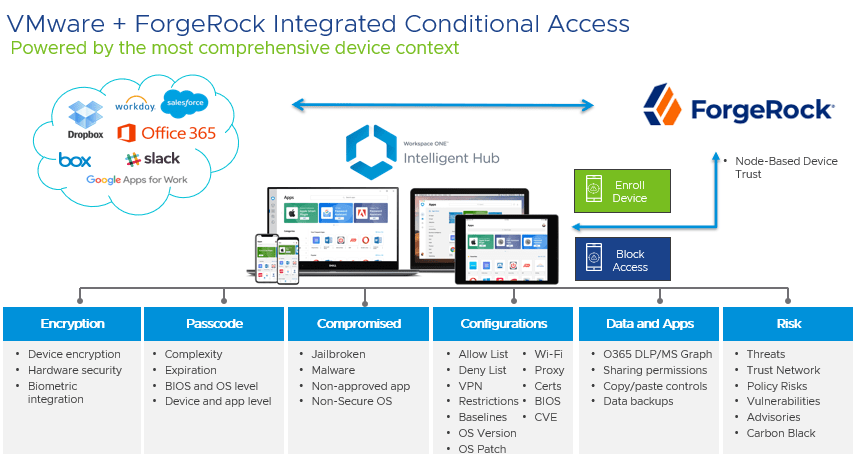
In Workspace ONE, you can validate a variety of policies including encryption, passcodes, specific configurations around software versions or OS patch levels as well as input from Carbon Black and the Workspace ONE Intelligence Trust Network.
In this blog, I’m going to assume that you already have ForgeRock AM 7.1 configured with SAAS applications already setup and configured. I also won’t go into the setup and configuration of Workspace ONE Access and UEM. Please make sure you have Workspace ONE UEM and Access already integrated including User Sync, Connectors, Mobile SSO and/or Certificates.
Although not tested, its possible to implement this on versions prior to AM 7.1. You will need to add the SAML Authentication Node from the ForgeRock Marketplace.
- Exporting your Workspace ONE Access Metadata
- Adding your Remote IDP in AM
- Modifying your Hosted SP in AM
- Exporting your ForgeRock SAML Metadata
- Creating a ForgeRock AM Application in Workspace ONE Access
- Create a ForgeRock AM Access Policy in Workspace ONE Access
- Create your ForgeRock AM Authentication Tree
- Creating Optional Scripts for your Authentication Trees
- Modify your Hosted IdP to use your Authentication Tree
Exporting your Workspace ONE Access Metadata
- Log into the Workspace ONE Access Admin Console
- Go to Catalog -> Web Apps
- Click on the settings button
- Click on SAML Metadata
- Download your “Identity Provider (IdP Metadata)”
Adding your Remote IDP in AM
- In your AM Admin Console, go to the Realm where you want to configure this integration. In my blog, I will be using the top realm.
- Depending on your AM setup, you may want to use an existing Circle of Trust (COT) or create a new one. You should note that we will need to modify the Hosted SP associated with this COT and Workspace ONE needs to be in the same COT as the SAAS applications. Please take this into account when choosing which COT you want to use.
- Expand Applications -> Federation -> Circles of Trust to create a new Circle of Trust if necessary.
- Expand Applications -> Federation -> Entity Providers
- Click “Add Entity Provider -> Remote”
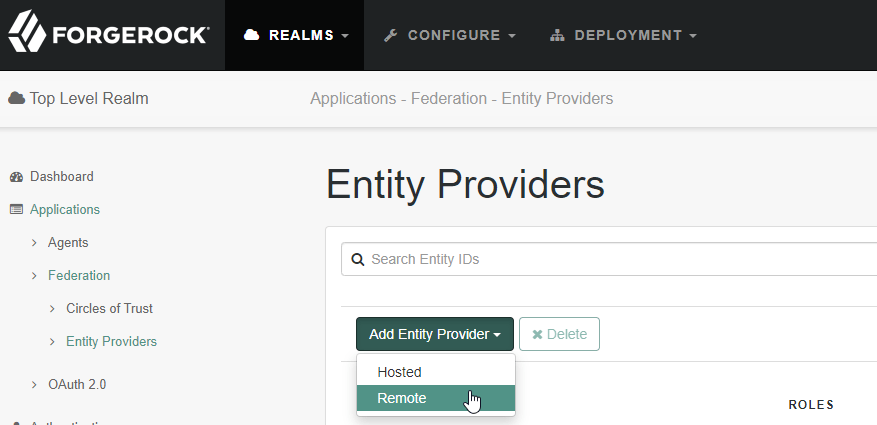
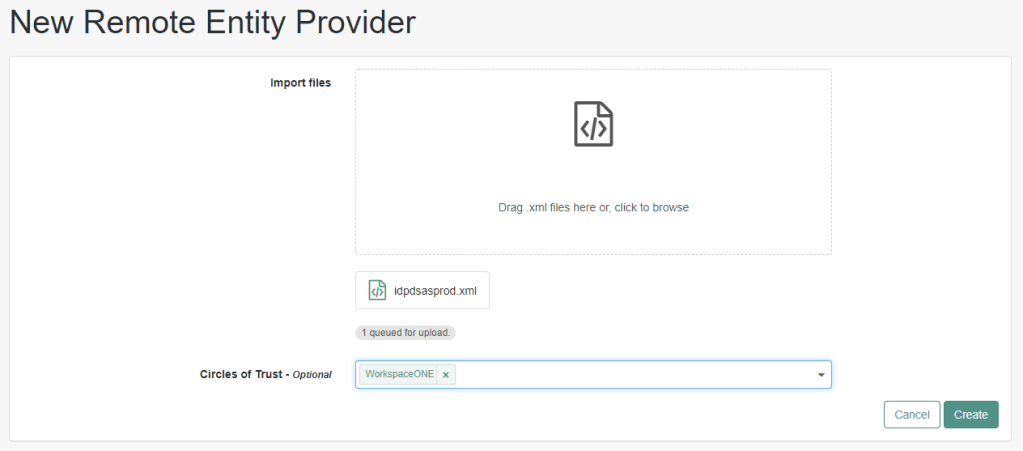
- Drag the Workspace ONE IdP Metadata that we previously downloaded and click Create
Modifying your Hosted SP in AM
In this section we need to modify the ACS URL for your hosted SP instance in ForgeRock. Please keep this mind in case you want to create a new one.
- In your Entity Providers List, click on your Hosted SP
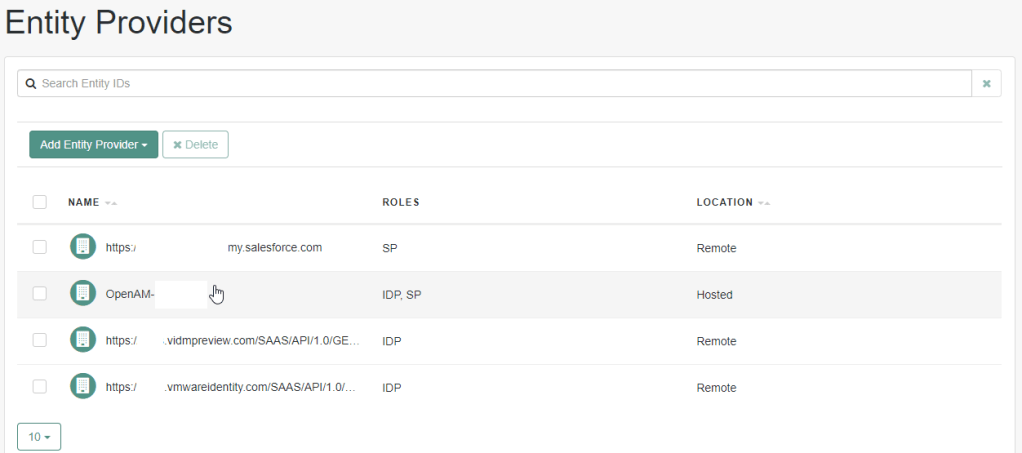
- If your Hosted SP has dual roles, click on the SP role

- Click on the Services tab
- Scroll down to the Assertion Consumer Service. Modify your HTTP-POST binding from /Consumer/ to /AuthConsumer/. Although in my screenshot I changed the Artifact binding, its not required for the integration with Workspace ONE.
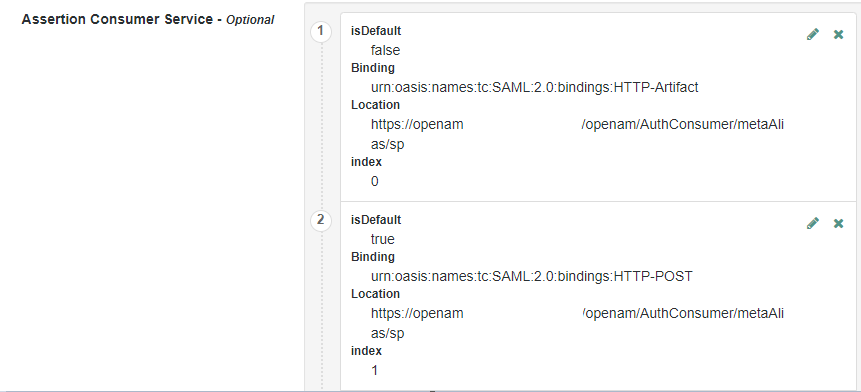
- Click Save Changes
Exporting your ForgeRock SAML Metadata
- In your browser, go to: [ServerURL]/saml2/jsp/exportmetadata.jsp?entityid=[entityID]&realm=/realmname
- ServerURL = Your fully qualified url including port for HTTPS.
- EntityID = The EntityID of your Hosted SP
- RealmName = The realm you are currently using for this configuration. If you are using the top realm, use /
- Save a copy of this file locally.
Creating a ForgeRock AM Application in Workspace ONE Access
- In your Workspace ONE Access Admin Console, go to Catalog -> Web Apps
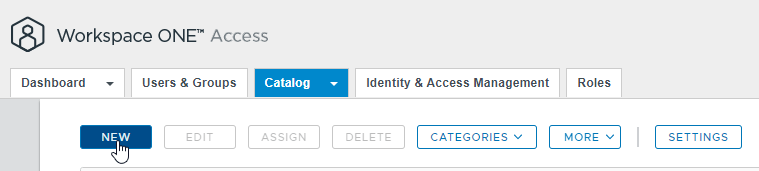
- Click New
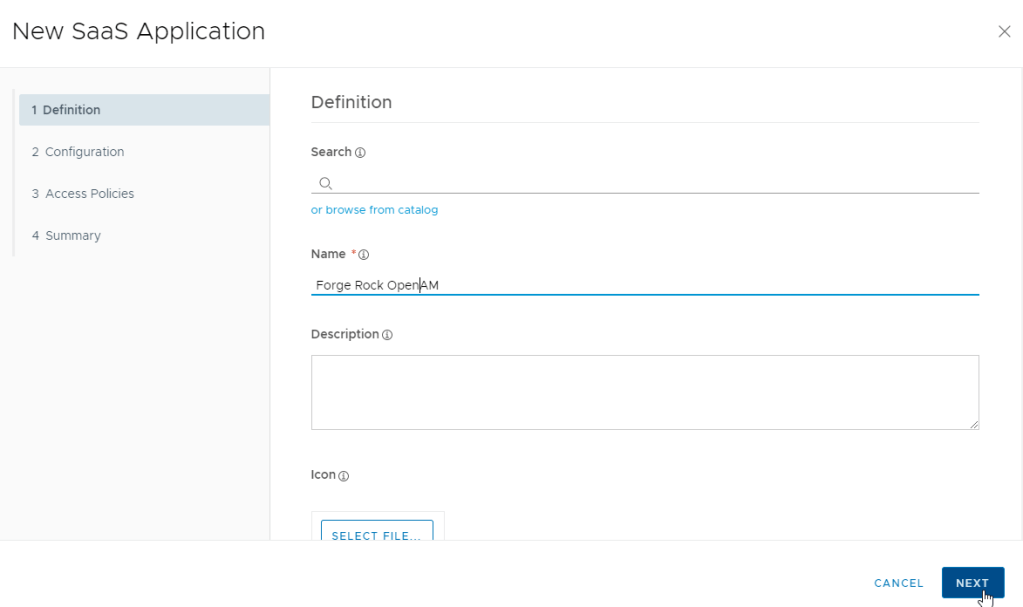
- Provide a friendly name and click next
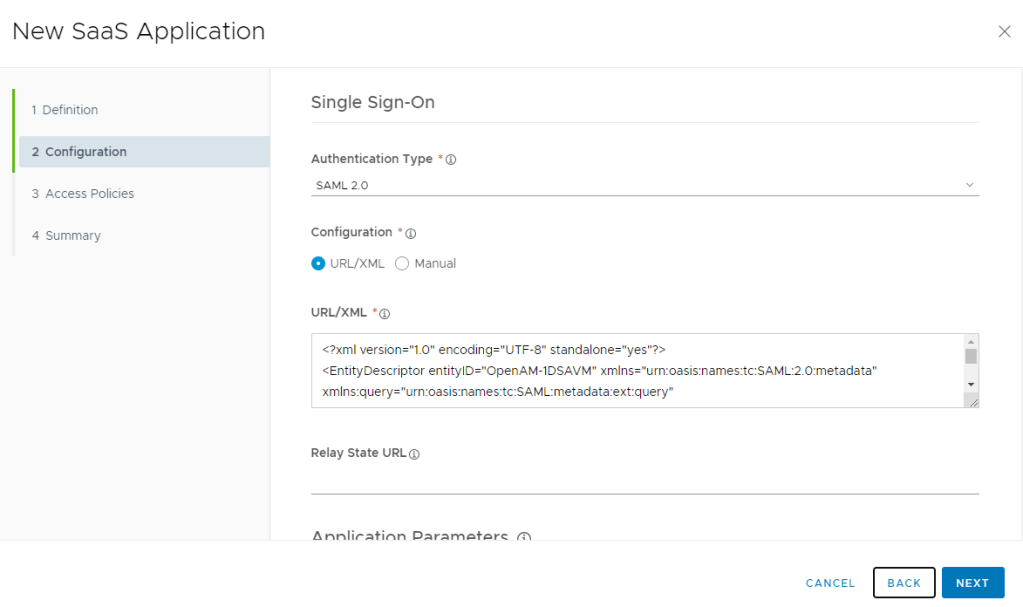
- Paste the contents of your ForgeRock metadata and click Next
- Click Next, Next and Save
- Now we’ll take a look at the application we just created, select the ForgeRock application and click Edit.
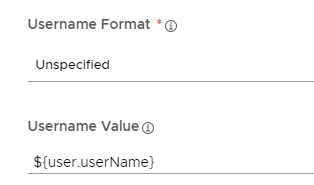
- Verify the Username field in Workspace ONE has the correct value to match the username on the ForgeRock side:
- Change the Signature Algorithm and Digest Algorithm to SHA256

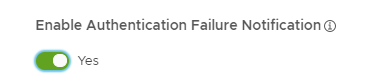
- If you want any Workspace ONE Authentication Failures to be returned to ForgeRock select the “Enable Authentication Failure Notification”. Note: If you want to send failures back to ForgeRock, you should not provide a fallback authentication mechanism (see next section) in your access policy.
- Click Next, Next Save
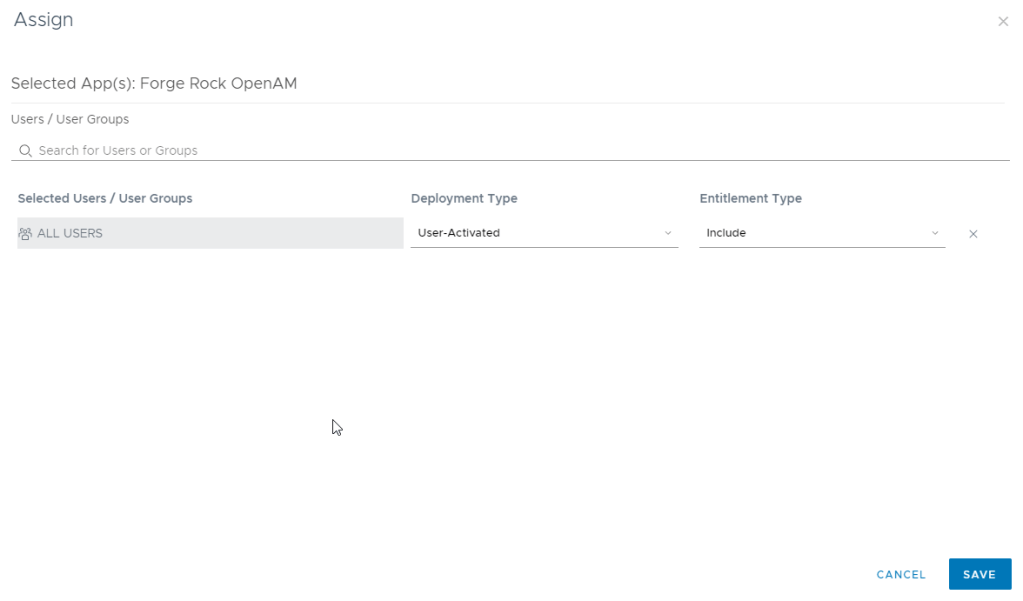
- Assign your ForgeRock Application to “All Users”
Create a ForgeRock AM Access Policy in Workspace ONE Access
Although you can use the Default Access Policy in Workspace ONE Access to authenticate requests coming from ForgeRock, this is not considered a best practice (see https://theidentityguy.ca/2021/02/25/workspace-one-access-best-practices-in-policy-management/).
- In Workspace ONE Access, go to Identity & Access Management -> Policies
- Click Add Policy
- Provide a name, ie ForgeRock Policy
- Create a policy for each desired platform. Its strongly recommended you read my best practices blog for guidance on creating policies.
- On Mobile – Use Mobile SSO + Device Compliance (+Risk)
- On Desktop – Use Certificate + Device Compliance (+ Risk)
- Save your Policy
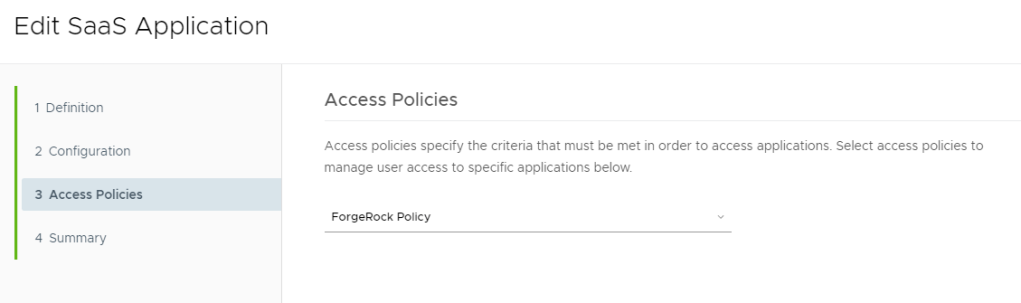
- Edit your ForgeRock AM application we created in the previous section and change the Access Policy to use your new Access Policy
Create your ForgeRock AM Authentication Tree
In this section we’ll go through two separate scenarios on integrating Workspace ONE Access with ForgeRock AM. If you’ve never seen ForgeRock Authentication Trees, be prepared to be amazed – in all the identity solutions I have worked with, I have never seen anything like this.
Using Workspace ONE After ForgeRock Authentication
In the current version of AM there is no ability to copy an existing Authentication Tree (like they do in their cloud product) so we’ll have to create an authentication tree from scratch. In this example, I’m going to prompt for username/password in ForgeRock before sending the request to Workspace ONE.
- In AM, click on Authentication -> Trees
- Click Create Tree
- Provide a name for your authentication tree and click “Create”

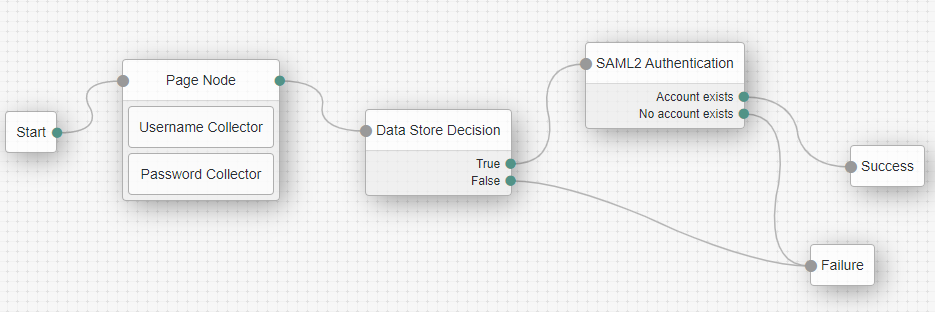
- Lets start by dragging a Page Node (under Utilities) on the grid.
- Drag a Username Collection into the Page Node
- Drag a Password into the Page Node
- Optionally, bring in the Page Headers similar to the platform-login authentication Tree
- Drag a Data Store Decision Node on the grid
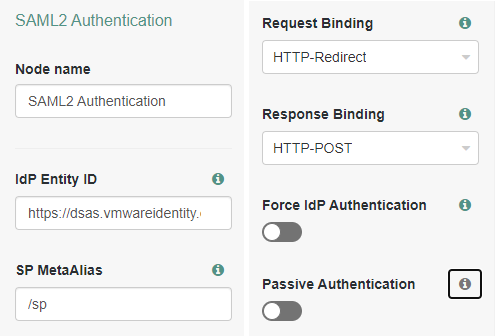
- Drag a SAML Authentication Node on the grid
- Update your “IdP Entity ID” so its equal to your WS1 Idp Metadat previously imported. ie. https://dsas.vmwareidentity.com/SAAS/API/1.0/GET/metadata/idp.xml
- Change the Response Binding to “HTTP-POST”
- Connect Start -> Page Node -> Data Store Decision -> SAML2 Authentication -> Success/Failure
- Click Save
- Using an incognito browser, test your authentication flow using a similar url:
https://openam.mydomain.com:8443/openam/XUI/?realm=/&authIndexType=service&authIndexValue=WS1DeviceTrust
You should get logged into the ForgeRock Console with your test user if everything worked. Here are a few things to look out for if you received a failure:
- Verify the ForgeRock Hosted SP Urls have been changed to “/AuthConsumer/” as mentioned previously.
- Verify that Workspace ONE is using “/AuthConsumer/”
- Verify in Workspace ONE that the ForgeRock application is assigned to your users.
- Verify the correct signing/encryption requirements are met in Workspace ONE for the ForgeRock application
- Verify the correct value in the NameID is being sent.
Using Workspace ONE Before ForgeRock Authentication (MFA)
- In this section, we’ll modify the existing tree we just created. If you want to create a new tree to test this flow you can follow the steps above to create a new authentication tree.
- Delete the Page Node and Datastore Nodes from your tree.
- Connect the start node to the SAML Authentication Node:
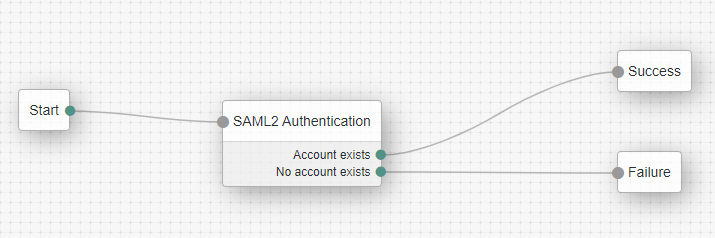
- Although not represented in this blog, add your specific MFA nodes after a success account match on the SAML Authentication Node.
Creating Optional Scripts for your Authentication Trees
We are going to create two scripts that will be used by our authentication tree. You may not need both scripts (or perhaps none at all) depending on your requirements.
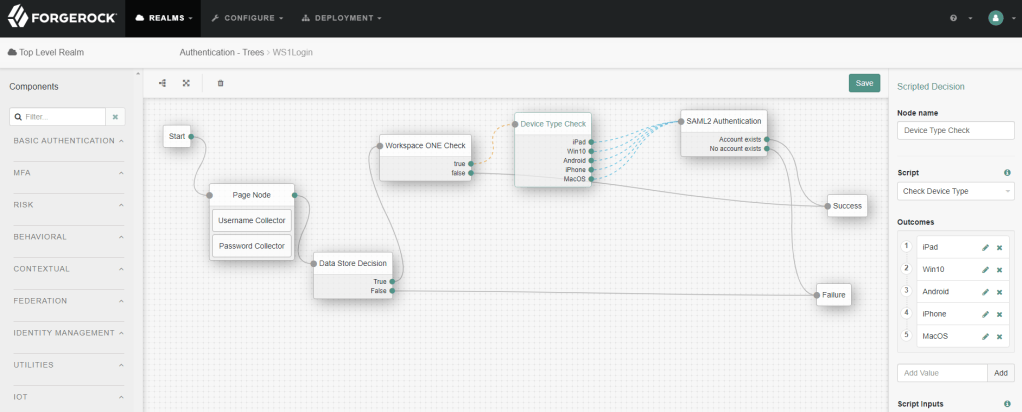
The first script, which I’ve called “Workspace ONE Check” is used to determine which SAAS applications will be redirected to Workspace ONE Access for the device trust validation. If you are controlling this from your Circle of Trust, this script may not be required. In our Hosted IDP, we will change the Auth URL so it uses our Authentication Tree. In this sample script, you will need to include all the SP Entity ID’s that you want redirected to Workspace ONE.
The second script, which I’ve called “Check Device Type” will determine the OS Platform so you can route specific platforms to Workspace ONE.
The sample code described herein is provided on an “as is” basis, without warranty of any kind, to the fullest extent permitted by law.
Workspace ONE Check
As I mentioned previously, these optional scripts can look at your Entity ID’s and route the specific requests to Workspace ONE.
Script Type: Decision node script for Authentication Trees
Language: JavaScript
 /*
  - Data made available by nodes that have already executed are available in the sharedState variable.
  - The script should set outcome to either "true" or "false".
 */
var fr = JavaImporter(
    org.forgerock.openam.auth.node.api.Action,
   com.sun.identity.authentication.callbacks.ScriptTextOutputCallback
)
var WorkspaceONECheck =['https://dsas.vmwareidenity.com',
                        'https://login.microsoftonline.com',
                        'https://vmware-dev-ed.my.salesforce.com'];

if (requestParameters.get("spEntityID")){
var spEntityID = requestParameters.get("spEntityID").get(0);

if (WorkspaceONECheck.indexOf(spEntityID) !== -1){
  outcome="true";
}else{
  outcome="false";
}
}
In the above script, modify the WorkspaceONECheck array to include your SP Entity ID’s.
Check Device Type
This is also an optional script that will determine the OS Platform (including iPadOS) for the purpose of granular OS redirection.
Script Type: Decision node script for Authentication Trees
Language: JavaScript
var fr = JavaImporter(
    org.forgerock.openam.auth.node.api.Action,
    com.sun.identity.authentication.callbacks.HiddenValueCallback,
    com.sun.identity.authentication.callbacks.ScriptTextOutputCallback

)
outcome="unknown";
touchscreen ="false";
var script = "if (navigator.maxTouchPoints){document.getElementById('clientScriptOutputData').value = 'True'} \n\
document.getElementById('loginButton_0').click()";


if (callbacks.isEmpty()) {

    action = fr.Action.send(
        new fr.HiddenValueCallback("clientScriptOutputData", "false"),
        new fr.ScriptTextOutputCallback(script)
    ).build();

} else {
  	touchscreen = callbacks.get(0).getValue();
  var headerName = "user-agent";
	if (requestHeaders.get(headerName).get(0).indexOf("iPad") !== -1) {

		outcome = "iPad";
	}
	if (requestHeaders.get(headerName).get(0).indexOf("Windows NT 10.0") !== -1) {
      outcome = "Win10"

	}
	if (requestHeaders.get(headerName).get(0).indexOf("iPhone") !== -1) {
		outcome = "iPhone";
	}
	if (requestHeaders.get(headerName).get(0).indexOf("Android") !== -1) {
		outcome = "iPhone";
	}
	if (requestHeaders.get(headerName).get(0).indexOf("Macintosh") !== -1) {
      if(touchscreen === 'True'){
        outcome="iPad";
      }else{
		outcome = "MacOS";
      }

	}

}
Add your Scripted Decision Nodes with the appropriate outcomes into your Authentication Tree:
Modify your Hosted IdP to use your Authentication Tree
- Expand Applications -> Federation -> Entity Providers
- Click on your hosted IDP
- Click on the IDP Role

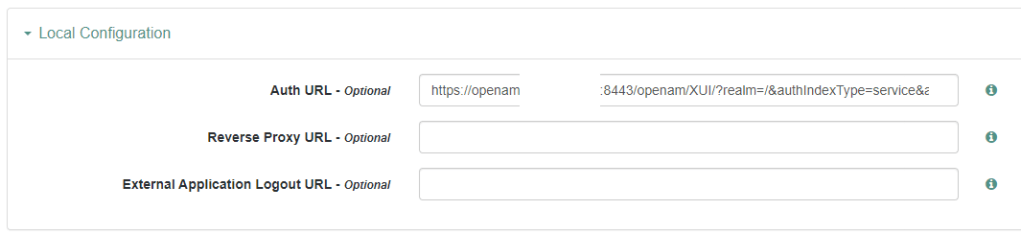
- Click on the Assertion Processing Tab
- Scroll down to the Local Configuration and Enter Your Auth URL to your Authentication Tree: https://openam.mydomain.com:8443/openam/XUI/?realm=/&authIndexType=service&authIndexValue=WS1DeviceTrust
- Click Save Changes
