
Torii is a SAAS management platform that gives you visibility to manage SAAS application sprawl, SAAS spend optimization and a powerful no code workflow automation engine. Look out for an upcoming blog where I’ll walk through some of these capabilities in much more detail. When you integrate Torii with your SAAS applications and your Identity Providers, Torii can potentially discover hundreds of applications used by your organization. But what about the applications not currently integrated with your identity providers? The Torii browser extension can help identify those additional SAAS applications being used by your organization. For more information on the extension, check out https://www.toriihq.com/extension
In this blog, I’m going to walk through the process of deploying the Torii Browser Extension using VMware Workspace ONE .
- Deploying in Google Chrome on MacOS
- Deploying in Google Chrome on Windows 10
- Deploying in Microsoft Edge on Windows 10
- Building the Application Profile Manually
Warning – The instructions in this blog will update the registry on your endpoints. Please test deploying on a test endpoint before deploying widespread to all your endpoints.
Deploying in Google Chrome on MacOS using Workspace ONE
If you are using Workspace ONE to manage your Mac OS devices, you can follow the guide posted below:
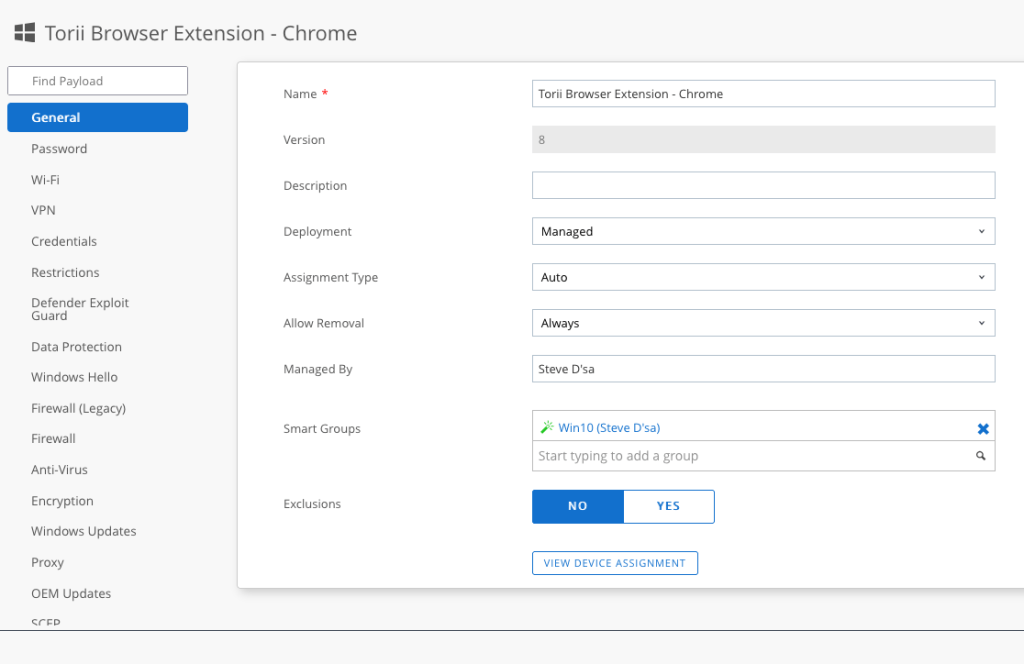
Deploying in Google Chrome on Windows 10 using Workspace ONE
- In your Workspace ONE UEM console , go to Resources -> Profiles and Baselines – Profiles
- Select Add -> Add Profile
- Select Windows -> Windows Desktop -> Device Profile
- Provide a Name and assign a smart group for your windows devices
- Click on Custom Settings on the left (Scroll to the bottom)
- For Target, select “Workspace ONE Intelligent Hub”
- Un-check “Make Commands Atomic”

- Under Initial Settings, paste the following custom profile. Note: This profile contains an encoded command that will add the Torii Browser Extension via a powershell command. I strongly recommend you read the section on building the profile manually to customize the powershell for your environment.
<wap-provisioningdoc id="47cdf1f4-7c99-44e5-bf5e-d3fecca68a74" name="customprofile">
<characteristic type="com.airwatch.winrt.powershellcommand" uuid="b6d3bb2d-7c2b-46d9-8d50-71a8a87ee820">
<parm name="PowershellCommand" value="&$env:SystemRoot\sysnative\WindowsPowerShell\v1.0\powershell.exe -EncodedCommand JAByAGUAZwBpAHMAdAByAHkAUABhAHQAaAAgAD0AIAAnAEgASwBMAE0AOgBcAFMAbwBmAHQAdwBhAHIAZQBcAFAAbwBsAGkAYwBpAGUAcwBcAEcAbwBvAGcAbABlAFwAQwBoAHIAbwBtAGUAXABFAHgAdABlAG4AcwBpAG8AbgBJAG4AcwB0AGEAbABsAEYAbwByAGMAZQBsAGkAcwB0ACcADQAKACQAVABvAHIAaQBpAFIAZQBnAGkAcwB0AHIAeQBQAHIAbwBwAGUAcgB0AHkAVgBhAGwAdQBlACAAPQAgACIAawBoAGYAaABrAGUAZABoAGgAZABiAGUAagBjAGIAYQBwAGQAaQBjAGcAYQBnAGIAbABqAGkAbQBhAGsAYQBpADsAaAB0AHQAcABzADoALwAvAGMAbABpAGUAbgB0AHMAMgAuAGcAbwBvAGcAbABlAC4AYwBvAG0ALwBzAGUAcgB2AGkAYwBlAC8AdQBwAGQAYQB0AGUAMgAvAGMAcgB4ACIADQAKAFsAaQBuAHQAXQAgACQAcAByAG8AcABlAHIAdAB5AEMAbwB1AG4AdAAgAD0AIAAwAA0ACgBJAGYAIAAoACEAKABUAGUAcwB0AC0AUABhAHQAaAAgACQAcgBlAGcAaQBzAHQAcgB5AFAAYQB0AGgAKQApACAAewANAAoAIAAgACAAIABOAGUAdwAtAEkAdABlAG0AIAAtAFAAYQB0AGgAIAAkAHIAZQBnAGkAcwB0AHIAeQBQAGEAdABoACAALQBGAG8AcgBjAGUAIAAgACAAIAAgACAAIAANAAoAfQAgAGUAbABzAGUAIAB7AA0ACgAJACQAaQB0AGUAbQAgAD0AIABHAGUAdAAtAEkAdABlAG0AIAAtAFAAYQB0AGgAIAAkAHIAZQBnAGkAcwB0AHIAeQBQAGEAdABoAA0ACgAJAGYAbwByAGUAYQBjAGgAIAAoACQAcAByAG8AcAAgAGkAbgAgACQAaQB0AGUAbQAuAFAAcgBvAHAAZQByAHQAeQApACAAewANAAoACQAJACQAcAByAG8AcABlAHIAdAB5AEMAbwB1AG4AdAArACsADQAKAAkAfQANAAoAfQANAAoAJAByAGUAZwBpAHMAdAByAHkASwBlAHkAIAA9ACAAJABwAHIAbwBwAGUAcgB0AHkAQwBvAHUAbgB0ACAAKwAgADEADQAKAE4AZQB3AC0ASQB0AGUAbQBQAHIAbwBwAGUAcgB0AHkAIAAtAFAAYQB0AGgAIAAkAHIAZQBnAGkAcwB0AHIAeQBQAGEAdABoACAALQBOAGEAbQBlACAAJAByAGUAZwBpAHMAdAByAHkASwBlAHkAIAAtAFYAYQBsAHUAZQAgACQAVABvAHIAaQBpAFIAZQBnAGkAcwB0AHIAeQBQAHIAbwBwAGUAcgB0AHkAVgBhAGwAdQBlACAAIAAtAFAAcgBvAHAAZQByAHQAeQBUAHkAcABlACAAIgBTAHQAcgBpAG4AZwAiAA==" />
</characteristic>
</wap-provisioningdoc>- Under Remove Settings paste the following custom profile. Note: This profile contains an encoded command that will remove the Torii Browser Extension via a powershell command. I strongly recommend you read the section on building the profile manually to customize the powershell for your environment.
<wap-provisioningdoc id="3443f782-0a33-4474-b519-d2bfe207493c" name="customprofile">
<characteristic type="com.airwatch.winrt.powershellcommand" uuid="8ac8d044-b35e-4534-8a3d-f7502c9fcb35">
<parm name="PowershellCommand" value="&$env:SystemRoot\sysnative\WindowsPowerShell\v1.0\powershell.exe -EncodedCommand JAByAGUAZwBpAHMAdAByAHkAUABhAHQAaAAgAD0AIAAnAEgASwBMAE0AOgBcAFMAbwBmAHQAdwBhAHIAZQBcAFAAbwBsAGkAYwBpAGUAcwBcAEcAbwBvAGcAbABlAFwAQwBoAHIAbwBtAGUAXABFAHgAdABlAG4AcwBpAG8AbgBJAG4AcwB0AGEAbABsAEYAbwByAGMAZQBsAGkAcwB0ACcADQAKACQAVABvAHIAaQBpAFIAZQBnAGkAcwB0AHIAeQBQAHIAbwBwAGUAcgB0AHkAVgBhAGwAdQBlACAAPQAgACIAawBoAGYAaABrAGUAZABoAGgAZABiAGUAagBjAGIAYQBwAGQAaQBjAGcAYQBnAGIAbABqAGkAbQBhAGsAYQBpADsAaAB0AHQAcABzADoALwAvAGMAbABpAGUAbgB0AHMAMgAuAGcAbwBvAGcAbABlAC4AYwBvAG0ALwBzAGUAcgB2AGkAYwBlAC8AdQBwAGQAYQB0AGUAMgAvAGMAcgB4ACIADQAKACQAVABvAHIAaQBpAFIAZQBnAGkAcwB0AHIAeQBQAHIAbwBwAGUAcgB5AE4AYQBtAGUAIAA9ACAAJwBmAGEAbABzAGUAJwANAAoADQAKAEkAZgAgACgAVABlAHMAdAAtAFAAYQB0AGgAIAAiACQAcgBlAGcAaQBzAHQAcgB5AFAAYQB0AGgAIgApACAAewANAAoACQAkAGkAdABlAG0AIAA9ACAARwBlAHQALQBJAHQAZQBtACAALQBQAGEAdABoACAAJAByAGUAZwBpAHMAdAByAHkAUABhAHQAaAANAAoACQBmAG8AcgBlAGEAYwBoACAAKAAkAHAAcgBvAHAAIABpAG4AIAAkAGkAdABlAG0ALgBQAHIAbwBwAGUAcgB0AHkAKQAgAHsADQAKAAkAaQBmACgAJABpAHQAZQBtAC4ARwBlAHQAVgBhAGwAdQBlACgAJABwAHIAbwBwACkAIAAtAG0AYQB0AGMAaAAgACQAVABvAHIAaQBpAFIAZQBnAGkAcwB0AHIAeQBQAHIAbwBwAGUAcgB0AHkAVgBhAGwAdQBlACkAIAB7ACAACQAkAFQAbwByAGkAaQBSAGUAZwBpAHMAdAByAHkAUAByAG8AcABlAHIAeQBOAGEAbQBlACAAPQAgACQAcAByAG8AcAAgAH0ADQAKAAkAfQANAAoAfQANAAoAaQBmACAAKAAkAFQAbwByAGkAaQBSAGUAZwBpAHMAdAByAHkAUAByAG8AcABlAHIAeQBOAGEAbQBlACAALQBuAGUAIAAiAGYAYQBsAHMAZQAiACkAewANAAoAUgBlAG0AbwB2AGUALQBJAHQAZQBtAFAAcgBvAHAAZQByAHQAeQAgAC0AUABhAHQAaAAgACQAcgBlAGcAaQBzAHQAcgB5AFAAYQB0AGgAIAAtAE4AYQBtAGUAIAAkAFQAbwByAGkAaQBSAGUAZwBpAHMAdAByAHkAUAByAG8AcABlAHIAeQBOAGEAbQBlAA0ACgB9AA==" />
</characteristic>
</wap-provisioningdoc>- Click Save and Publish
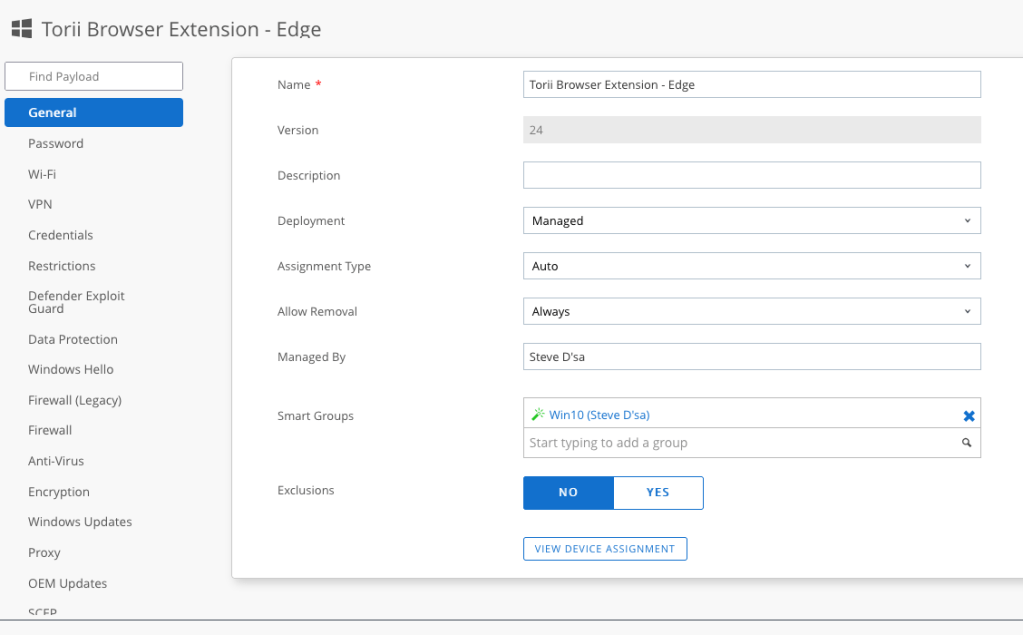
Deploying in Microsoft Edge on Windows 10
- In your Workspace ONE UEM console , go to Resources -> Profiles and Baselines – Profiles
- Select Add -> Add Profile
- Select Windows -> Windows Desktop -> Device Profile
- Provide a Name and assign a smart group for your windows devices
- Click on Custom Settings on the left (Scroll to the bottom)
- For Target, select “Workspace ONE Intelligent Hub”
- Un-check “Make Commands Atomic”
- Under Initial Settings, paste the following custom profile. Note: This profile contains an encoded command that will add the Torii Browser Extension via a powershell command. I strongly recommend you read the section on building the profile manually to customize the powershell to your environment.
<wap-provisioningdoc id="403c7682-0160-4ba8-9cdf-ffb8395d5b4f" name="customprofile">
<characteristic type="com.airwatch.winrt.powershellcommand" uuid="35cd527c-c1c1-4930-9e66-75b3d5d4c5f1">
<parm name="PowershellCommand" value="&$env:SystemRoot\sysnative\WindowsPowerShell\v1.0\powershell.exe -EncodedCommand JAByAGUAZwBpAHMAdAByAHkAUABhAHQAaAAgAD0AIAAnAEgASwBMAE0AOgBcAFMATwBGAFQAVwBBAFIARQBcAFAAbwBsAGkAYwBpAGUAcwBcAE0AaQBjAHIAbwBzAG8AZgB0AFwARQBkAGcAZQBcAEUAeAB0AGUAbgBzAGkAbwBuAEkAbgBzAHQAYQBsAGwARgBvAHIAYwBlAGwAaQBzAHQAJwANAAoAJABUAG8AcgBpAGkAUgBlAGcAaQBzAHQAcgB5AFAAcgBvAHAAZQByAHQAeQBWAGEAbAB1AGUAIAA9ACAAIgBnAG0AagBmAHAAbgBnAHAAawBrAGIAZQBpAGMAZgBsAG0AYwBrAGIAaABkAGIAbgBhAG4AZgBmAGsAaQBoAGkAOwBoAHQAdABwAHMAOgAvAC8AZQBkAGcAZQAuAG0AaQBjAHIAbwBzAG8AZgB0AC4AYwBvAG0ALwBlAHgAdABlAG4AcwBpAG8AbgB3AGUAYgBzAHQAbwByAGUAYgBhAHMAZQAvAHYAMQAvAGMAcgB4ACIADQAKAFsAaQBuAHQAXQAgACQAcAByAG8AcABlAHIAdAB5AEMAbwB1AG4AdAAgAD0AIAAwAA0ACgANAAoASQBmACAAKAAhACgAVABlAHMAdAAtAFAAYQB0AGgAIAAkAHIAZQBnAGkAcwB0AHIAeQBQAGEAdABoACkAKQAgAHsADQAKACAAIAAgACAATgBlAHcALQBJAHQAZQBtACAALQBQAGEAdABoACAAJAByAGUAZwBpAHMAdAByAHkAUABhAHQAaAAgAC0ARgBvAHIAYwBlACAAIAAgACAAIAAgACAADQAKAH0AIABlAGwAcwBlACAAewANAAoACQAkAGkAdABlAG0AIAA9ACAARwBlAHQALQBJAHQAZQBtACAALQBQAGEAdABoACAAJAByAGUAZwBpAHMAdAByAHkAUABhAHQAaAANAAoACQBmAG8AcgBlAGEAYwBoACAAKAAkAHAAcgBvAHAAIABpAG4AIAAkAGkAdABlAG0ALgBQAHIAbwBwAGUAcgB0AHkAKQAgAHsADQAKAAkACQAkAHAAcgBvAHAAZQByAHQAeQBDAG8AdQBuAHQAKwArAA0ACgAJAH0ADQAKAH0ADQAKACQAcgBlAGcAaQBzAHQAcgB5AEsAZQB5ACAAPQAgACQAcAByAG8AcABlAHIAdAB5AEMAbwB1AG4AdAAgACsAIAAxAA0ACgBOAGUAdwAtAEkAdABlAG0AUAByAG8AcABlAHIAdAB5ACAALQBQAGEAdABoACAAJAByAGUAZwBpAHMAdAByAHkAUABhAHQAaAAgAC0ATgBhAG0AZQAgACQAcgBlAGcAaQBzAHQAcgB5AEsAZQB5ACAALQBWAGEAbAB1AGUAIAAkAFQAbwByAGkAaQBSAGUAZwBpAHMAdAByAHkAUAByAG8AcABlAHIAdAB5AFYAYQBsAHUAZQAgACAALQBQAHIAbwBwAGUAcgB0AHkAVAB5AHAAZQAgACIAUwB0AHIAaQBuAGcAIgANAAoADQAKAA0ACgANAAoA" />
</characteristic>
</wap-provisioningdoc>- Under Remove Settings paste the following custom profile. Note: This profile contains an encoded command that will remove the Torii Browser Extension via a powershell command. I strongly recommend you read the section on building the profile manually to customize the powers
<wap-provisioningdoc id="2c41433a-053a-4a5f-9998-df1bc8240265" name="customprofile">
<characteristic type="com.airwatch.winrt.powershellcommand" uuid="e2c6be54-abf6-4af9-8615-e9e868fdbdf1">
<parm name="PowershellCommand" value="&$env:SystemRoot\sysnative\WindowsPowerShell\v1.0\powershell.exe -EncodedCommand JAByAGUAZwBpAHMAdAByAHkAUABhAHQAaAAgAD0AIAAnAEgASwBMAE0AOgBcAFMATwBGAFQAVwBBAFIARQBcAFAAbwBsAGkAYwBpAGUAcwBcAE0AaQBjAHIAbwBzAG8AZgB0AFwARQBkAGcAZQBcAEUAeAB0AGUAbgBzAGkAbwBuAEkAbgBzAHQAYQBsAGwARgBvAHIAYwBlAGwAaQBzAHQAJwANAAoAJABUAG8AcgBpAGkAUgBlAGcAaQBzAHQAcgB5AFAAcgBvAHAAZQByAHQAeQBWAGEAbAB1AGUAIAA9ACAAIgBnAG0AagBmAHAAbgBnAHAAawBrAGIAZQBpAGMAZgBsAG0AYwBrAGIAaABkAGIAbgBhAG4AZgBmAGsAaQBoAGkAOwBoAHQAdABwAHMAOgAvAC8AZQBkAGcAZQAuAG0AaQBjAHIAbwBzAG8AZgB0AC4AYwBvAG0ALwBlAHgAdABlAG4AcwBpAG8AbgB3AGUAYgBzAHQAbwByAGUAYgBhAHMAZQAvAHYAMQAvAGMAcgB4ACIADQAKACQAVABvAHIAaQBpAFIAZQBnAGkAcwB0AHIAeQBQAHIAbwBwAGUAcgB5AE4AYQBtAGUAIAA9ACAAJwBmAGEAbABzAGUAJwANAAoADQAKAEkAZgAgACgAVABlAHMAdAAtAFAAYQB0AGgAIAAiACQAcgBlAGcAaQBzAHQAcgB5AFAAYQB0AGgAIgApACAAewANAAoACQAkAGkAdABlAG0AIAA9ACAARwBlAHQALQBJAHQAZQBtACAALQBQAGEAdABoACAAJAByAGUAZwBpAHMAdAByAHkAUABhAHQAaAANAAoACQBmAG8AcgBlAGEAYwBoACAAKAAkAHAAcgBvAHAAIABpAG4AIAAkAGkAdABlAG0ALgBQAHIAbwBwAGUAcgB0AHkAKQAgAHsADQAKAAkAaQBmACgAJABpAHQAZQBtAC4ARwBlAHQAVgBhAGwAdQBlACgAJABwAHIAbwBwACkAIAAtAG0AYQB0AGMAaAAgACQAVABvAHIAaQBpAFIAZQBnAGkAcwB0AHIAeQBQAHIAbwBwAGUAcgB0AHkAVgBhAGwAdQBlACkAIAB7ACAACQAkAFQAbwByAGkAaQBSAGUAZwBpAHMAdAByAHkAUAByAG8AcABlAHIAeQBOAGEAbQBlACAAPQAgACQAcAByAG8AcAAgAH0ADQAKAAkAfQANAAoAfQANAAoAaQBmACAAKAAkAFQAbwByAGkAaQBSAGUAZwBpAHMAdAByAHkAUAByAG8AcABlAHIAeQBOAGEAbQBlACAALQBuAGUAIAAiAGYAYQBsAHMAZQAiACkAewANAAoAUgBlAG0AbwB2AGUALQBJAHQAZQBtAFAAcgBvAHAAZQByAHQAeQAgAC0AUABhAHQAaAAgACQAcgBlAGcAaQBzAHQAcgB5AFAAYQB0AGgAIAAtAE4AYQBtAGUAIAAkAFQAbwByAGkAaQBSAGUAZwBpAHMAdAByAHkAUAByAG8AcABlAHIAeQBOAGEAbQBlAA0ACgB9AA==" />
</characteristic>
</wap-provisioningdoc>- Click Save and Publish
Building the Application Profile Manually
To add the browser extension on Windows 10 we need to update the windows registry. Typically, registry entries can be updated directly via a CSP, however browser extensions are in a restricted portion of the registry. This is the reason why we need to use a powershell command.
The following are the Powershell commands used in the above steps to “Add” and “Remove” the profiles. The “Add” examples will search the registry and find the correct registry key to use for the extension. The registry key (1,2,3…etc) is determined by counting the number of entries and using next available number as the key for this browser extension. The “Remove” command will find the number associated with the browser extension and will remove that value.
Note: The supplied powershell scripts will not check if the browser extension exists before adding it. However, the script can be easily modified to do so.
For additional information on the registry entry see: https://help.toriihq.com/en/collections/1605868-browser-extension#extension-deployment
Please update the scripts to meet your business requirements.
Google Chrome – Add Profile
$registryPath = 'HKLM:\Software\Policies\Google\Chrome\ExtensionInstallForcelist'
$ToriiRegistryPropertyValue = "khfhkedhhdbejcbapdicgagbljimakai;https://clients2.google.com/service/update2/crx"
[int] $propertyCount = 0
If (!(Test-Path $registryPath)) {
    New-Item -Path $registryPath -Force
} else {
	$item = Get-Item -Path $registryPath
	foreach ($prop in $item.Property) {
		$propertyCount++
	}
}
$registryKey = $propertyCount + 1
New-ItemProperty -Path $registryPath -Name $registryKey -Value $ToriiRegistryPropertyValue  -PropertyType "String"
Google Chrome – Remove Profile
$registryPath = 'HKLM:\Software\Policies\Google\Chrome\ExtensionInstallForcelist'
$ToriiRegistryPropertyValue = "khfhkedhhdbejcbapdicgagbljimakai;https://clients2.google.com/service/update2/crx"
[int] $propertyCount = 0
$registryPath = 'HKLM:\Software\Policies\Google\Chrome\ExtensionInstallForcelist'
$ToriiRegistryPropertyValue = "khfhkedhhdbejcbapdicgagbljimakai;https://clients2.google.com/service/update2/crx"
$ToriiRegistryProperyName = 'false'

If (Test-Path "$registryPath") {
$item = Get-Item -Path $registryPath
foreach ($prop in $item.Property) {
if($item.GetValue($prop) -match $ToriiRegistryPropertyValue) { $ToriiRegistryProperyName = $prop }
}
}
if ($ToriiRegistryProperyName -ne "false"){
Remove-ItemProperty -Path $registryPath -Name $ToriiRegistryProperyName
}
Microsoft Edge – Add Profile
$registryPath = 'HKLM:\SOFTWARE\Policies\Microsoft\Edge\ExtensionInstallForcelist'
$ToriiRegistryPropertyValue = "gmjfpngpkkbeicflmckbhdbnanffkihi;https://edge.microsoft.com/extensionwebstorebase/v1/crx"
[int] $propertyCount = 0

If (!(Test-Path $registryPath)) {
    New-Item -Path $registryPath -Force
} else {
	$item = Get-Item -Path $registryPath
	foreach ($prop in $item.Property) {
		$propertyCount++
	}
}
$registryKey = $propertyCount + 1
New-ItemProperty -Path $registryPath -Name $registryKey -Value $ToriiRegistryPropertyValue  -PropertyType "String"
Microsoft Edge – Remove Profile
$registryPath = 'HKLM:\SOFTWARE\Policies\Microsoft\Edge\ExtensionInstallForcelist'
$ToriiRegistryPropertyValue = "gmjfpngpkkbeicflmckbhdbnanffkihi;https://edge.microsoft.com/extensionwebstorebase/v1/crx"
$ToriiRegistryProperyName = 'false'

If (Test-Path "$registryPath") {
	$item = Get-Item -Path $registryPath
	foreach ($prop in $item.Property) {
	if($item.GetValue($prop) -match $ToriiRegistryPropertyValue) { 	$ToriiRegistryProperyName = $prop }
	}
}
if ($ToriiRegistryProperyName -ne "false"){
Remove-ItemProperty -Path $registryPath -Name $ToriiRegistryProperyName
}
Once you have finalized your powershell scripts, you will need to covert them to bytes and then subsequently Base64. This process is prone to error and outlined in the following blog. In that blog, Camille provides a script that will create the profile automatically. I strongly recommend using the script that Camille has provided.
You can run the script as below:
.\create-ps-profile.ps1 -FilePath .\ToriiBrowser-Chrome.ps1 -Arch 64 This script will output a file that you can paste directly in the custom settings on the profile in Workspace ONE UEM.
