Currently today, when you are authenticating into Workspace ONE Access we support a variety of authentication methods including SAML, Certificates, Mobile SSO and Passwords. In this latest SAAS release, Workspace ONE Access will support OIDC with any 3rd party OIDC Provider such as Auth0.
My colleague Peter Bjork has a great video walkthrough of the OIDC Flow on VMware Tech Zone. If you jump to the 13 minute mark of the video he will walk through a basic configuration using two Workspace ONE Access environments.
In the initial release, we will only support the Authorization Code Grant flow and will support the OpenID, Profile and Email Scopes. Workspace ONE Access can also be configured to pass-through all the claims.
In this blog, we are going to walk through how to set this up using Auth0 as 3rd Party OIDC Provider for Workspace ONE Access. If you don’t have an Auth0 tenant, you can sign up for a free trial at https://auth0.com/signup

Setting up Auth0
- In your Auth0 Administration Console, go to Applications.
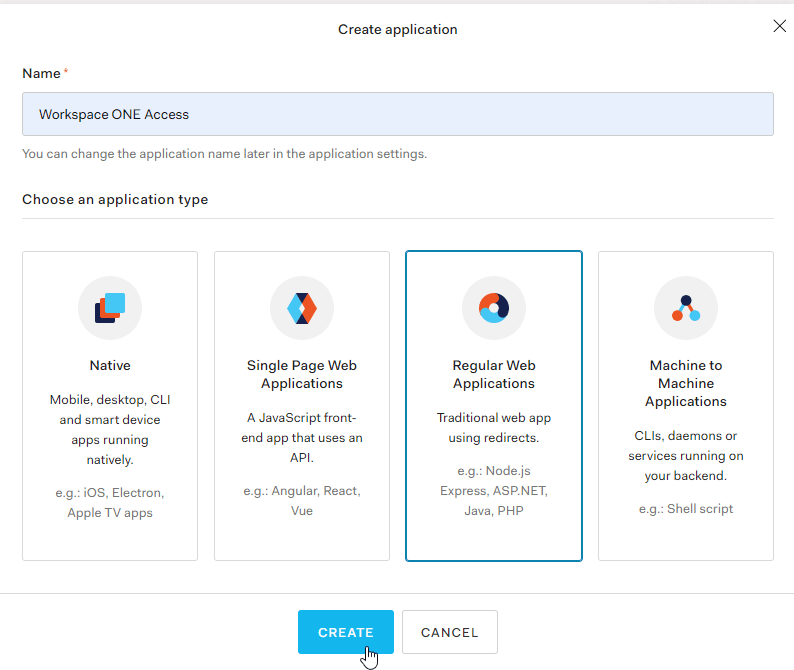
- Click on “Create Application”

- Provide a name, ie. “Workspace ONE Access” and choose “Regular Web Applications”
- Click on the Settings Tab
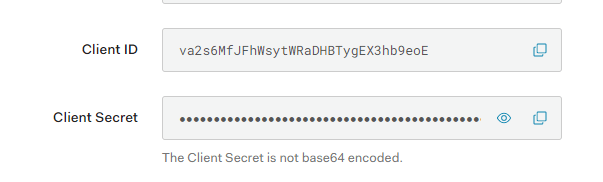
- Make Note of your Client ID and Secret as we’ll need this in the next section
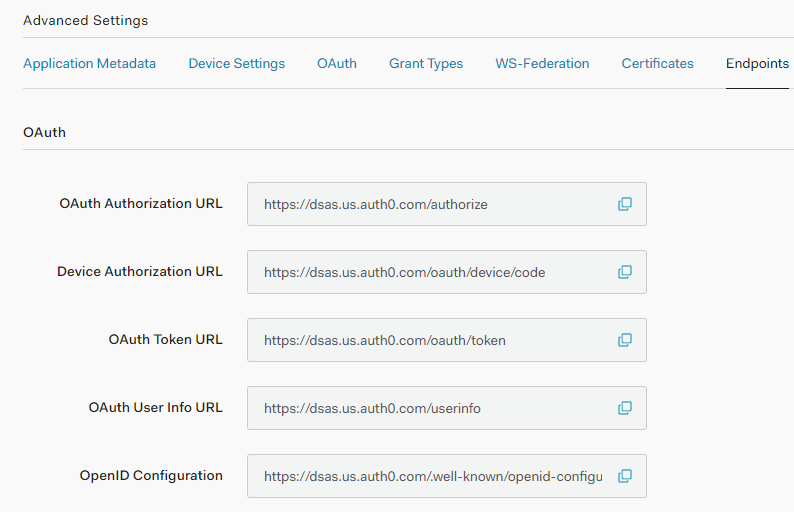
- Make note of your OpenID Configuration URL (Advanced Settings -> Endpoints)
Configuring Workspace ONE Access
- In the Workspace ONE Access Administration Console, go to Identity & Access Management -> Identity Providers
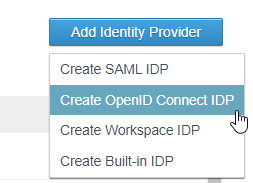
- Click Add Identity Provider -> Create OpenID Connect IDP
- Provide an Identity Provider Name, ie. “Auth0”
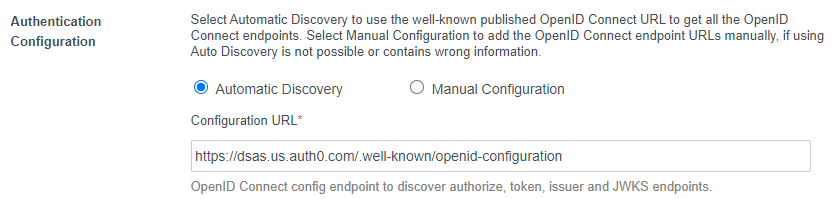
- Under Authentication Configuration, select “Automatic Discovery” and paste your OpenID Configuration URL from the previous section
- Under Client ID and Secret, paste the values from the previous section.

- In the User Lookup Attribute section, we need to map the correct inbound attribute from Auth0 to the correct attribute in Workspace ONE Access. I received a great tip from Peter Stromquist at Auth0 to look at the Raw JSON on a user account. You can see the values that are currently set for your user. You just have to be careful to ensure that the attribute belongs to either the User, Profile or Email scope. In my environment, it makes the most sense to map based on email:

Based on this data, I’m going to map the email attribute in the OpenID response to the Email Attribute in Workspace ONE Access:

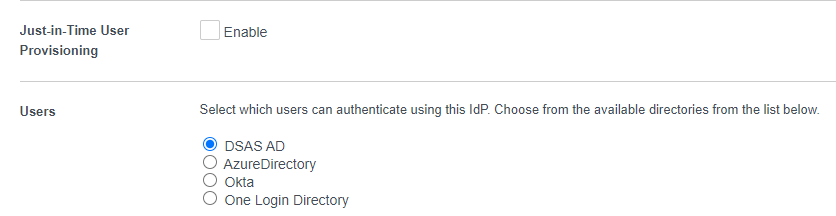
- Since my users are already created in Workspace ONE Access, I’m going to uncheck “Just-in-Time User Provisioning”. See Below for JIT Instructions
- Select the correct directory where your users reside
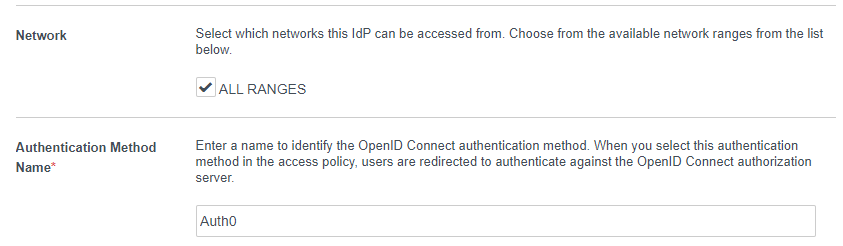
- Select “All Ranges” for the Network Range.
- Provide a name for the Authentication Method ie. Auth0
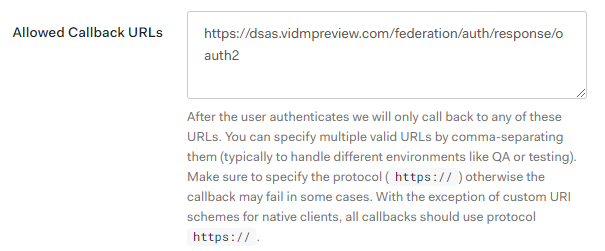
- Copy the Redirect URI
- Paste this value into the Callback URL section of the Workspace ONE Access Application in Auth0
- Click Add
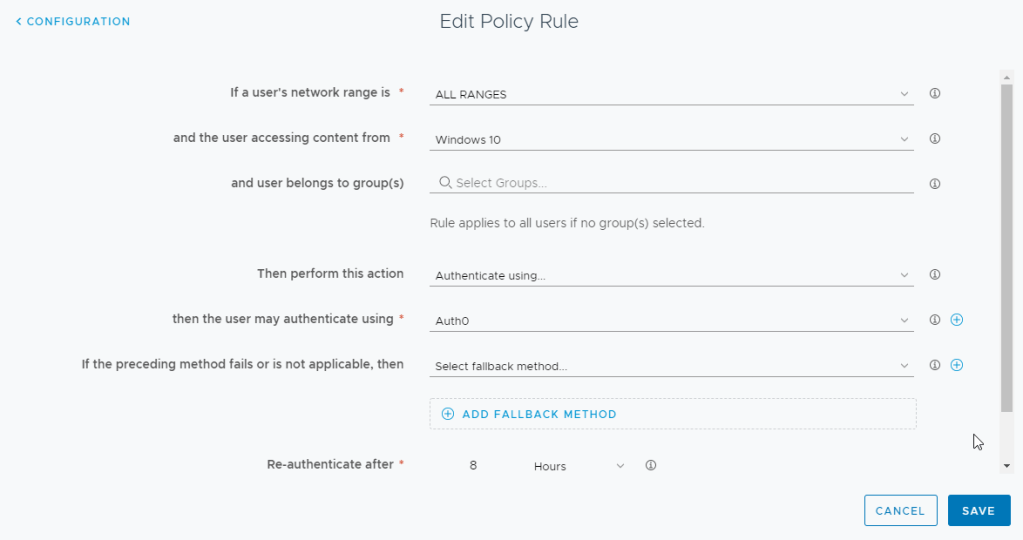
Update Workspace ONE Access Policies
- In Workspace ONE Access, click on Identity & Access Management -> Policies
- Edit the appropriate Access Policy
- Add the “Auth0” Authentication Method and Save
Testing the Configuration
- Assuming you modified the default policy, launch Workspace ONE access in an incognito window.
- You should automatically be redirected to Auth0
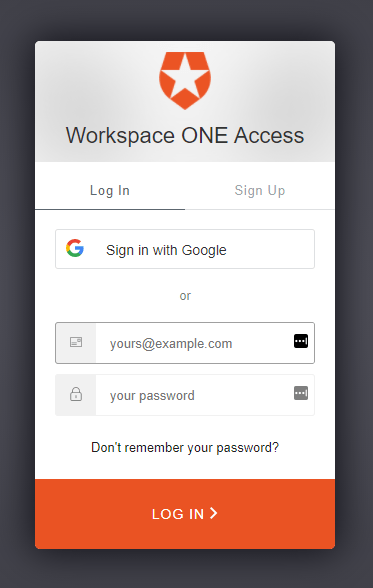
Note: If you are not redirected automatically check to see if you modified the correct policy. If you received an error, very your Auth0 URL’s and Client/Secret are entered correctly in Workspace ONE Access
- Once you enter your credentials you should be automatically logged into the Workspace ONE Application.
- You can also test this out from the Workspace ONE Intelligent Hub application. Look out for a future blog on enabling Social Logins via Auth0.
Just-in-Time User Provisioning
If you plan on creating users using JIT Provisioning, you will need to enable the Just-in-Time Provisioning Check box. Please remember that there is no lifecycle management capabilities with JIT, so you will have to develop a process for disabling/deleting users that are created in Workspace ONE.
One of the great things with OpenID Connect is that our mappings are defined based on the attributes sent in the previously mention supported scopes. You do however have to map them manually in Workspace ONE Access.
- Enter a name for the directory
- Add ALL the mandatory attributes in Workspace ONE Access so they can be mapped accordingly to an OIDC Attribute.
Note: Make sure you are sending a value for the ExternalID. This will be required so we can enroll devices with Workspace ONE UEM. With Auth0, they are sending a unique value in the subject.

