If you’ve not already configured Multi-Factor Authentication (MFA) for your users – seriously, what are you waiting for? There are dozens of different MFA solutions on the market today with varying capabilities including push notifications along with support for biometric verification. So why am I so excited for MFA in the Intelligent Hub?
- No registration required for managed devices.
- No additional applications are required for managed devices
- No phone numbers are required.
- No barcodes to scan
- MFA will be performed on a managed and *compliant* device!
In this blog I’m going to go through the Good and the Bad of Intelligent Hub Verify. I’m hopeful some of these negatives will be addressed an upcoming release.
Getting Started
- Log into the Workspace ONE Access Admin Console
- Go to Identity & Access Management -> Authentication Methods
- Click Configure for “Verify (Intelligent Hub)”
Note: This is different than VMware Verify. - Go ahead an enable the Authentication Method. I also recommend you enable Enhanced Verification as well to require biometric verification.
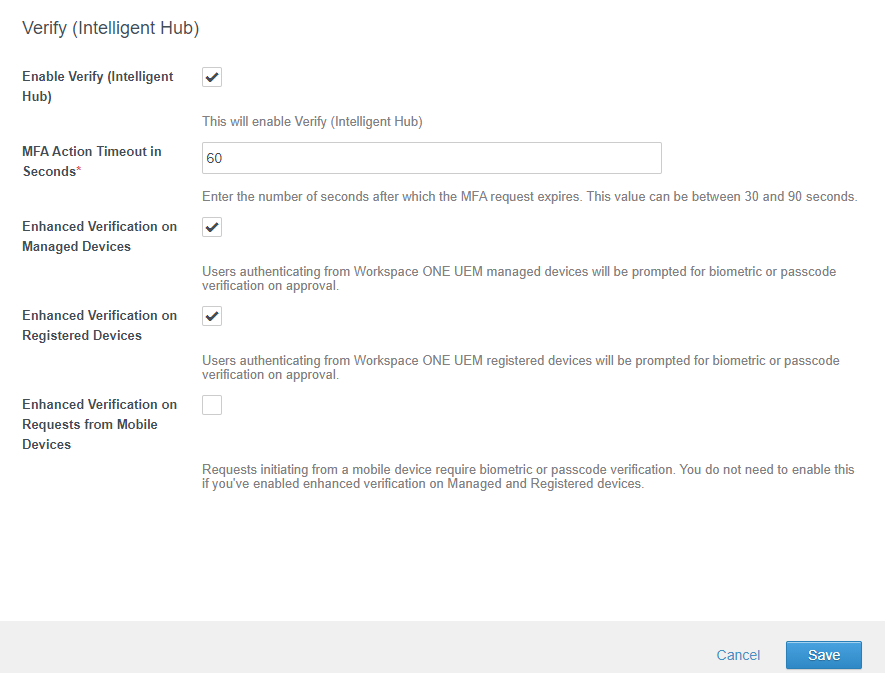
- Click Save
- Go to Identity Providers
- Click on your Built-In Provider
Note: This is the built-in provider that you are using for all your authentication methods such as Mobile SSO. This could be “Built-In” or a custom one that you created when setting up Workspace ONE Access. - Under Authentication Methods, make sure that Verify (Intelligent Hub) is enabled.
Note: Both versions of Verify can be enabled at the same time. However, it is not required.

- Click Save
Once you’ve enabled Verify (Intelligent Hub), all you need to do is add it to your policies and users can start using it right away. Policy Management is a little frustrating but we’ll get to that a little later in the blog.
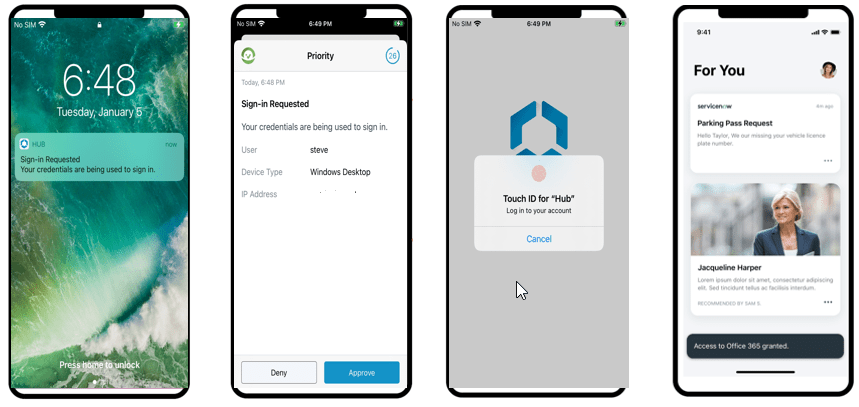
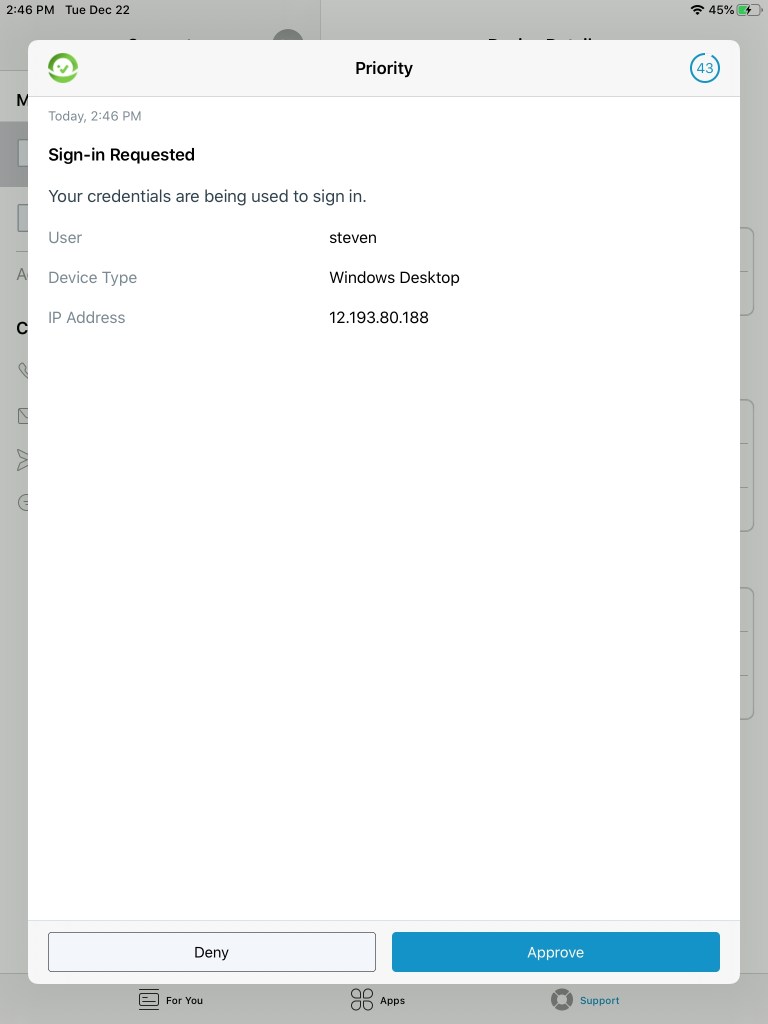
When a policy requires MFA, the user will receive an MFA prompt on their device
If you’ve enabled Enhanced Verification, they will also get a biometrics prompt as well:

So what happens if you have multiple devices? The first time you are required to do MFA, you will be prompted to select the device you want to use for MFA.

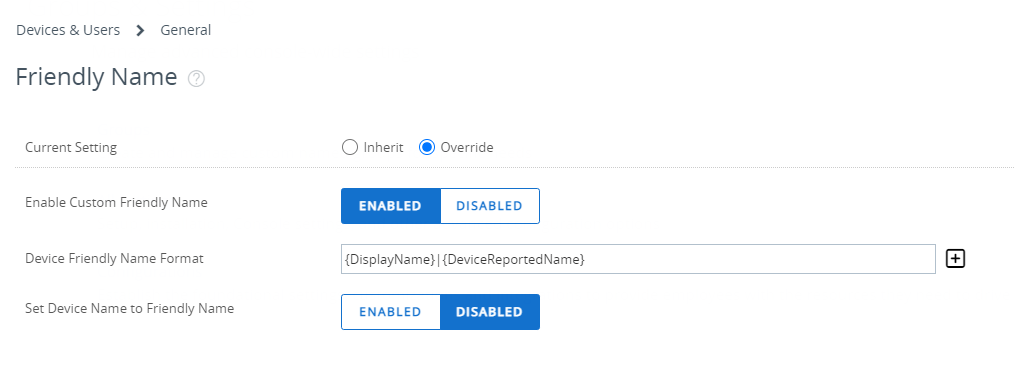
Workspace ONE Access will use the Friendly name to populate your device list. The format of the friendly name is defined in Workspace ONE UEM. You can see this in Groups & Settings -> Devices & Users -> General -> Friendly Name. If you need to update this, the friendly names will be updated on the next device sync in UEM.
Once you’ve selected a device, all notifications will be sent to that device. Please see Resetting a Preferred Hub MFA Device for instructions on how to reset this for a user.
Policy Management
Setting up your policies to use Verify (Intelligent Hub) might be a little confusing at first depending on how your existing policies are structured. I will break this section into two parts:
- Application Policies
- Default Access Policy
Its always good practice when defining access policies to not use the default access policy for any applications you’ve configured. The Default Access Policy should only be used for Enrollment and the Workspace ONE Portal. All other applications should be configure with a separate policy.
Application Policies
Setting up MFA for an Application Policy is pretty straight forward. In the policy management interface, you will need to define a primary authentication method (such as Certificate, Mobile SSO or Password Cloud) and use Verify (Intelligent Hub) as the secondary method.
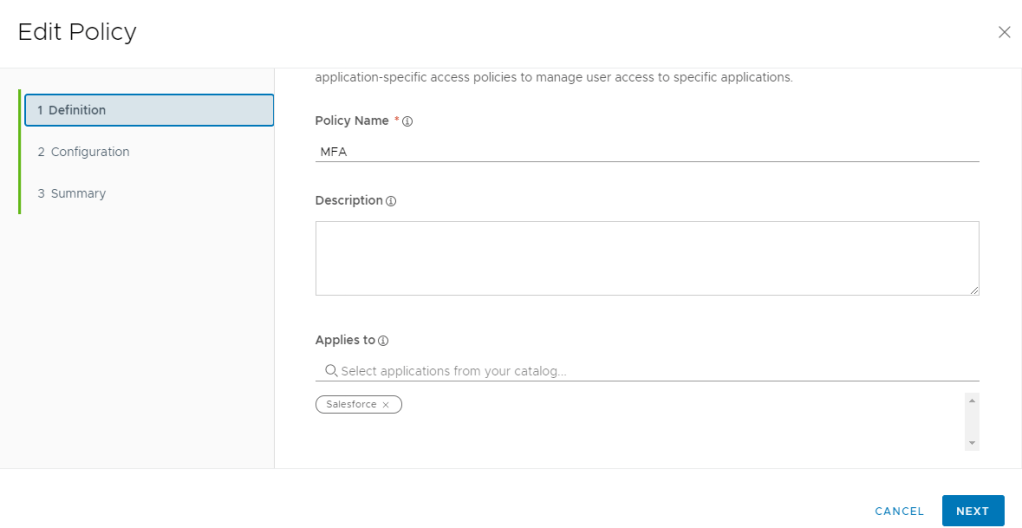
First, by application policy I’m referring to adding a new policy and assigning it to specific applications. In this example, I’ve created a Policy called “MFA” and I’ve assigned an application to this policy.
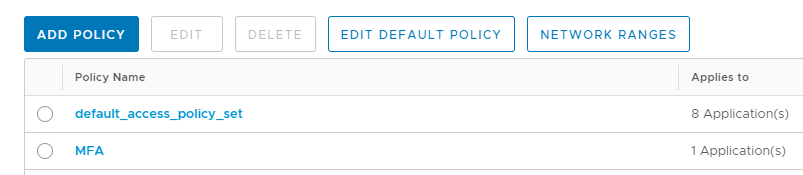
If you Click Add Policy, you can assign a Name and it can be applied to your existing applications:
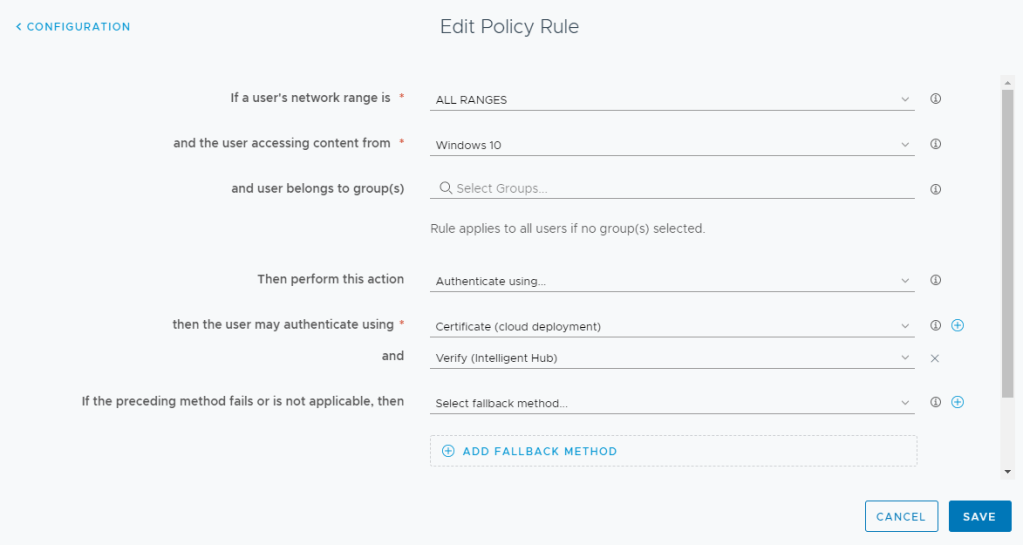
On the Configuration tab, you can define your OS specific policies:
Default Access Policy
Setting up MFA on the Default Policy can be a little frustrating. Currently, Verify (Intelligent Hub) is only available on the “Web Browser” type in the default policy. You will need to make sure your Web Browser Policy is defined below your Device Enrollment Policy.

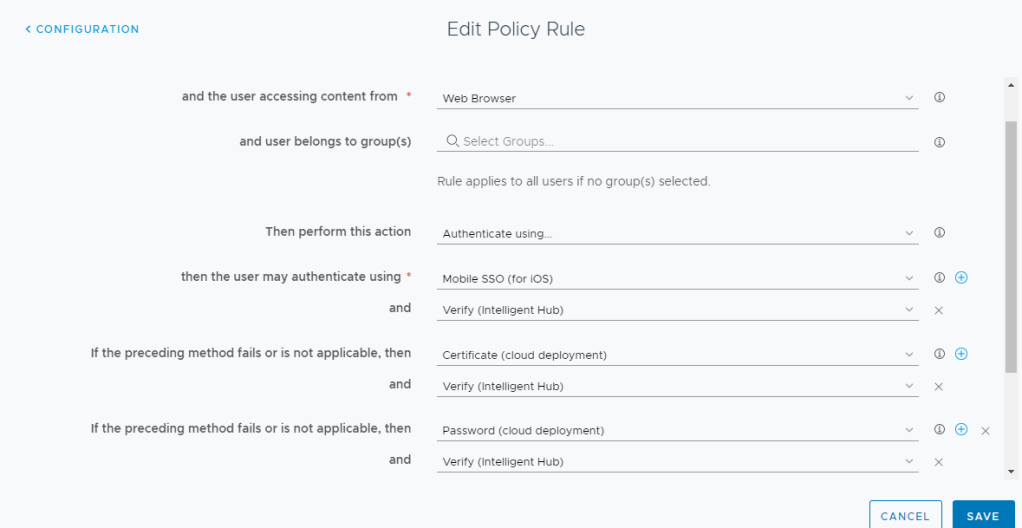
In the Web Browser Policy, you can define Verify (Intelligent Hub) with your OS Specific primary authentication method:
This is obviously not a great admin experience (nor a best practice) especially if you have defined OS specific policies in your Default Access Policy. I’m hopeful that VMware will allow you to configure Verify (Intelligent Hub) on OS specific policies in a future release.
Resetting a Preferred Hub MFA Device
Unfortunately, VMware has not provided a reset capability yet in the Hub or the Workspace ONE Access Portal to allow the user to switch their preferred Verify (Intelligent Hub) MFA Device. So for now we’ll have to use Postman. Please see my blog on using Postman with Workspace ONE Access:
- Perform a GET on a user to obtain their Internal ID. See Get User Details in the above mentioned blog.
- Open a new tab in Postman
- Add the Authorization Header
- Change the Auth Method to “Patch”
- For the URL, enter https://TENANTURL/SAAS/jersey/manager/api/scim/Users/{ID}
Replace the Tenant URL with your URL
Replace the ID with the ID from the previous step in this section.
ie. https://dsas.vmwareidentity.com/SAAS/jersey/manager/api/scim/Users/884b7e7d-6a7b-4985-b113-56235826e8a6 - Select Body
- Enter the JSON in raw text that we’ll post to Workspace ONE
- Select “JSON (application/json)” as the Content-Type
- Add the following in the body
{
  "schemas": [
    "urn:scim:schemas:core:1.0",
    "urn:scim:schemas:extension:workspace:tenant:sva:1.0",
    "urn:scim:schemas:extension:workspace:1.0",
    "urn:scim:schemas:extension:enterprise:1.0",
    "urn:scim:schemas:extension:workspace:mfa:1.0"
  ],
            "urn:scim:schemas:extension:workspace:mfa:1.0": {
                "hubMfaPreferredUDID": ""
            }
}- Click Send
- You should receive a “204 No Content” response

2 thoughts on “Bringing MFA into the Intelligent Hub”