
If you are looking at doing Certificate-Based Authentication in Workspace ONE, we always recommend you setup a 3rd Party Certificate Authority. Although Workspace ONE UEM does provide an internal CA, it may not provide the flexibility you require to meet all your requirements.
In this blog, we are going to walk through configuring Active Directory Certificate Services (ADCS) with your Workspace ONE UEM & Workspace ONE Access environments. I will be using the Distributed Component Object Model (DCOM) remote protocol for integration. These instructions are specific to a lab environment. Production environments will have tighter controls, especially around service accounts and template settings.
This blog assumes that you already have Active Directory Certificate Services already installed and configured.
Disclaimer: These instructions will guide you through the process of setting up your CA in a lab environment. Please consult professional services for anything on production.
A Workspace ONE UEM Cloud Connector is required for this configuration.
- Creating a Service Account
- Creating a Certificate Template
- Exporting your Root CA Certificate
- Creating a New Certificate Authority in Workspace ONE UEM
- Creating a New Certificate Template in Workspace ONE UEM
- Creating your Device Profile
- Configuring Workspace ONE Access
Creating a Service Account
- Open Active Directory Users and Computers and create a new user account that will be used by Workspace ONE UEM to Issue/Renew Certificates.
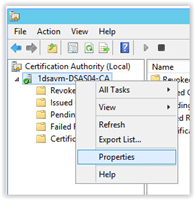
- In Administrative Tools, launch Certification Authority
- Right Click on your CA and Click Properties
- Click on the Security Tab -> Add
- Select the Service Account you just created
- Select the permissions “Issue and Manage Certificates” and “Request Certificates”

- Click OK
Creating a Certificate Template
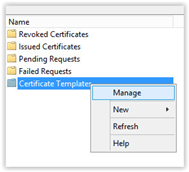
- In Certification Authority, right click on Certificate Templates and Click Manage
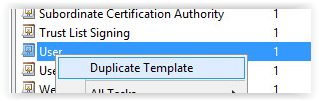
- Locate the “User” template and Right mouse and Select Duplicate Template
- Provide a Name for the Certificate (Don’t use any spaces in the template name) and uncheck “Publish Certificate in Active Directory”
Note: If this box was checked, certificates will be created in the service account used to enroll certs.
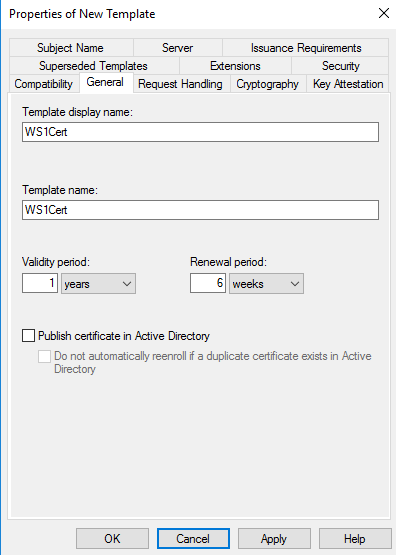
- Click OK
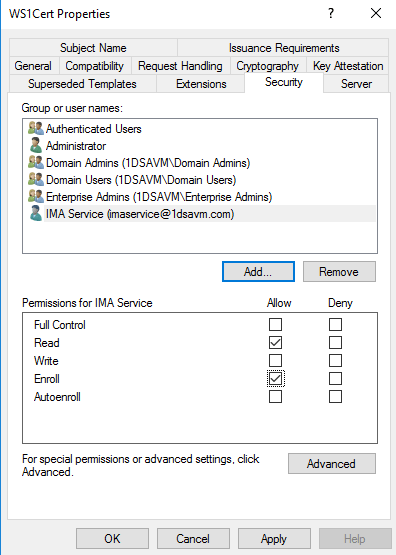
- Right mouse on the new template and click Properties
- Go to the Security Tab and assign the service account the ‘Read’ and ‘Enroll’ permissions
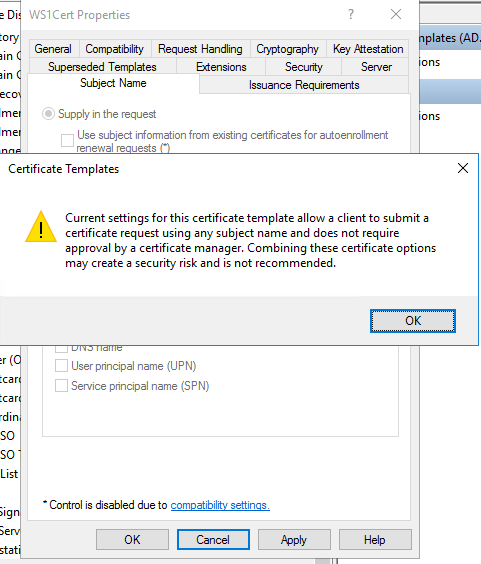
- Click Subject Name Tab and Select “Supply in the Request”
- Select OK to the Warning and Click OK again.
- Go back to the Certificate Authority Application
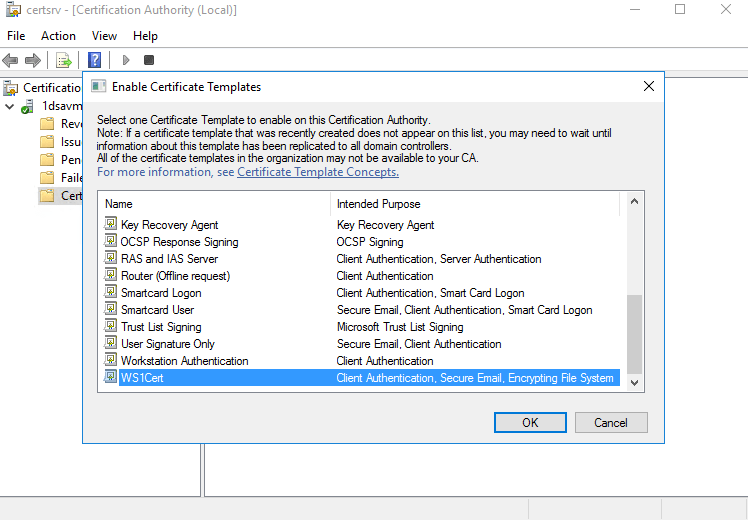
- Right mouse Certification Templates and Click New -> Certificate Template to Issue

- Select your new certificate template and Click OK
Export your Root CA Public Certificate
- Open the Certification Authority App (from Windows Administration Tools)
- Right click on your CA and Click Properties

- Click View Properties
- Click on the View certificate
- Click Details and Export to File
- Follow the Certificate Export Wizard using Base-64 Encoded format to export your root CA.
- Save this file locally as we’ll need this to upload to Workspace ONE Access later.
Creating a New Certificate Authority in Workspace ONE UEM
Note: You will need an installed Workspace ONE UEM Cloud Connector. Verify your connector can be reached by Workspace ONE UEM:

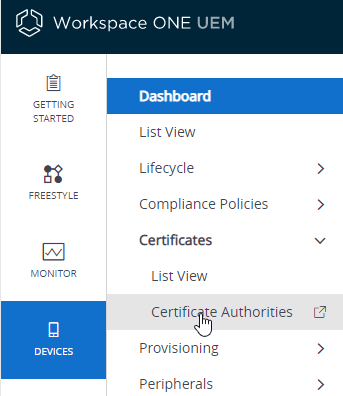
- In the Workspace ONE UEM Administration Console, go to Devices -> Certificates -> Certificate Authorities
- Click Add
- Provide a Name and Description
- Provide the hostname to reach your certificate server.
- Enter your CA Authority Name (Note: This is the name that appears in your Certification Authority)
- Enter your username of the service account and password
- Click Test Connection.
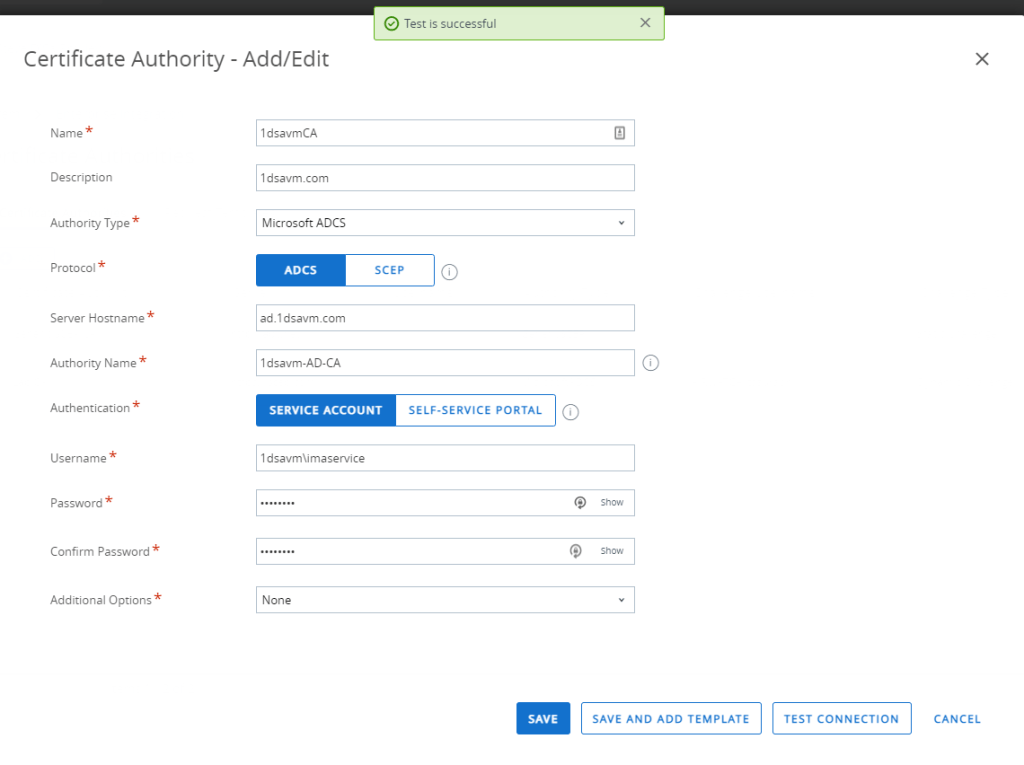
- Click Save
Creating a New Certificate Template in Workspace ONE UEM
- Click on the Request Templates Tab in Certificate Authorities (Workspace ONE UEM Administration Console, go to Devices -> Certificates -> Certificate Authorities)
- Click Add
- Provide a Name for the Template
- Select your Certificate Authority which you just created
- Enter your Issuing Template in the following format: certificatetemplate:[ADCS-TEMPLATE]. In my lab, my issuing template would be “certificatetemplate:WS1Cert”.
- Select the Subject Name. In my environment, I’m going to use the UPN as the subject name. Remember, the subject name is what the browser will present to the user. In Workspace ONE Access, we don’t have to use the subject to match to the correct user.
- Select the correct private key length (per your CA settings)
- Select both Signing and Encryption
- Under SAN, add the following:
- Email Address -> {EmailAddress}
- User Principal Name -> {UserPrincipalName}
- DNS Name -> UDID={DeviceUid}

- Select Automatic Certificate Renewal
- Select Name Certificate Revocation
- Click Save
Creating your Device Profile
- Click on Resources -> Profiles & Baselines -> Profiles
- Click Add -> Add Profile
- Select the Platform for this profile
- Depending on the platform, select User or Device Profile (Make sure there is a tab for “Credentials” on the platform).
- Provide a Name and Assign a Smart Group
- Click the Credentials Tab
- Select Defined Certificate Authority
- Select your CA
- Selected your Template
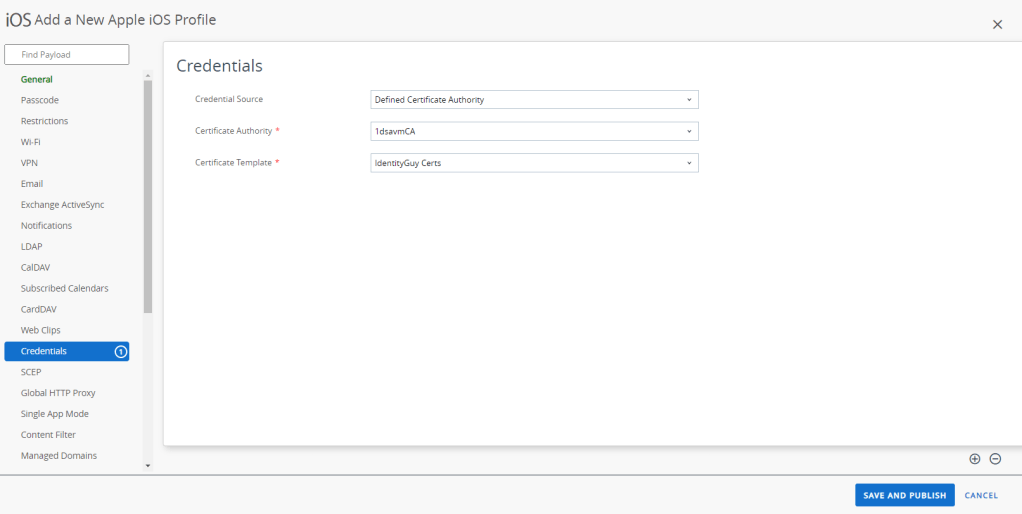
- Click Save and Publish
Configuring Workspace ONE Access
- In the Workspace ONE Access administration console, go to Identity & Access Management -> Authentication Methods.
If you previously ran the Workspace ONE UEM Wizards, the “Certificate (cloud deployment)” Authentication Method might already be enabled. If this already enabled, we are going to need to delete the uploaded CA’s and replace with the your Root CA Certificate from ADCS. - Click the Pencil icon beside Certificate (cloud deployment)
- Click Enable
- Click Select File and upload your root CA Certificate.
- In the User Identifier Search box, select the correct search order:
| Certificate Attribute | Attribute in Workspace ONE Access |
|---|---|
| Subject | Username |
| SAN Attribute: Principal Name | User Principal Name |
| SAN Attribute Email (RFC822 Name) |
- Optional – If you want to limit which certificates are allowed you can use the Certificate Policies Accepted field. Please note that this value is referring to Certificate Issuance Policies and NOT application policies (such as Client Authentication).
- In your ADCS environment, on your certificate template, click on the Extensions Tab and then click edit for “Issuance Policies”.
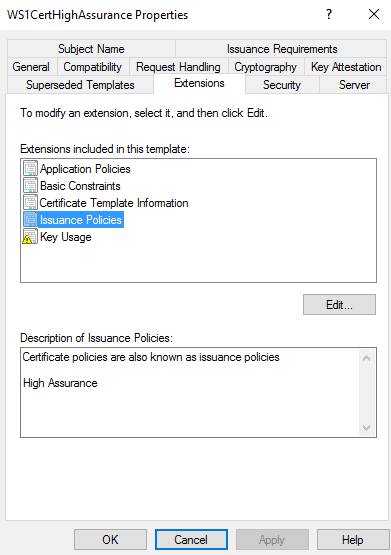
Select or Create a New Issuance Policy

Click OK and Edit the Policy
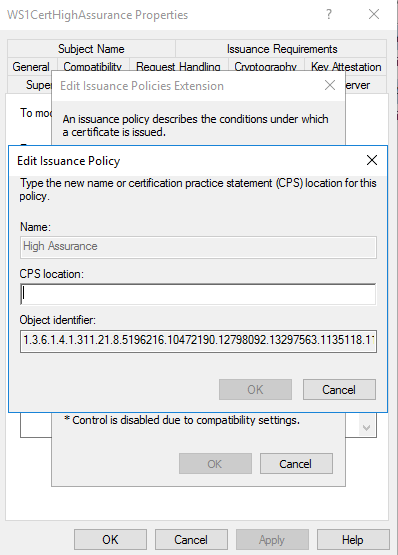
Copy the full Object Identifier (yes it might be a really long value) and Paste this value into Workspace ONE Access.
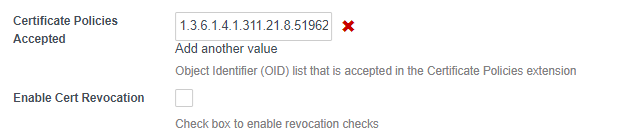
- Scroll down and click Save.

have you tested the renewal process? also this is missing that the service account used for the certificate requests need to have “Impersonate a client Authentication” access on the WS Gateway server.
LikeLike
Renewals should work fine. As far as Impersonate is concerned, that should only be required if you are using the Enroll on Behalf of Others function.
LikeLike
Thank you for this detailed step by step guide. I’m curious to know which permissions has the “Domain Users” group on the certificate template.
LikeLike
Hi ) i’m struggling with an issue on our WorkspaceOne : we have create a Certificate template for mac users that should authenticate on a Cisco ISE. We have found that Macbook are recognised as user and not as machine ( on certificate template on Subject Name field we have specified CN=XX-{DeviceSerialNumber}.domain ) . It appears correctly on the Certify but as i told before Cisco ISE recognise Macbook as user. maybe informations on Subject Name field should be always included on betweens braces?
Example :
CN={XX}:{EmailDomain}:{EnrollmentUser}:{EmailDomain}
Do you have any ideas? thanks for support
LikeLike
It’s sounds like you are using the wrong template in UEM. Most documentation in WS1 are for user templates. You will need the correct template that Cisco is looking for.
LikeLike
Thanks for reply, certificate seems correctly compiled and filled with same informations that we found on certificate used by Windows pc . i will try to find what Cisco is expecting on a certificate
LikeLike
Hi Steve, thanks for a lot of very useful tutorials.
You mentioned at beginning of this article that we can use internal CA of Workspace ONE UEM.
I’m struggling to find documentation how to actually use it, setup it etc…
Can you help me regarding that?
Thanks
LikeLike
There really is no configuration of the CA within UEM. When you integrate UEM with Workspace ONE using the wizards (I have a getting started blog) it will create all the certificate templates in UEM and configure Access with everything you need.
LikeLike